The girls and Becky started thinking about the combined birthday party in August. The girls wanted to do a fairy theme.
Thanks to LeeAnn Kim for many of these pictures.
Invitations
Becky, Child 2, and Child 1 watercolored each invitation individually on nice paper, then wrote out the invitations by hand. These were lovely, especially when taken as a group. Here are about half of them before they went out.
Felt Fairies
An idea was floated to make a little felt fairy for each guest child, as a party favor. The kids got really excited about this, since we have been perusing this book for a while:
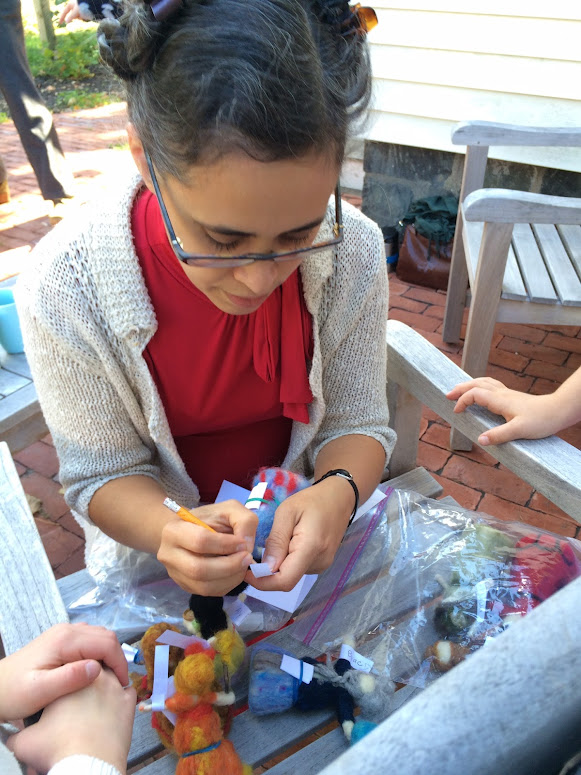
Becky got some felting needles and blocks of foam to put roving on while poking it. None of us had done needle felting before so this was fun to do! She roughed out the process based on this needle felting book; each fairy consisted of head and chest made from a big bunch of organic wool I bought years ago to stuff dolls, needled into a ball,
one pipe cleaner for arms, and a foam cone from Michael's for a lower body.
The arms and cone body were wrapped in plain wool and needled in place. The decorations and clothing were needled on from a few packs of dyed roving Becky had bought some time ago for another project.
Finally, little accessories were added like wands, staffs, acorn cap hats, and the like.
The girls did some of the felting.
Grandma helped out too.
Child 2 kept poking herself with the felting needle, and was getting frustrated, so she instead worked on clothing design. It does hurt when one inevitably sticks the big barbed needle into the hand positioning the work, and we did want to keep the amount of birthday girl blood on the party favors to a minimum!
She worked with me to design the hair and outfit for her fairy.
Check out how I continued the seams from the gores in the skirt up into princess seamlines in the bodice.
One problem was that we needed a lot of fairies, but the first few took several hours each to complete. We put in a few late nights of frantic needle felting, and with some improvement with practice and enough hours, all the basic fairies got done.
Decorating them was definitely everyone's favorite part.
The kids decided which of their friends were going to get which fairies, and nametags were applied.
These turned out awesome, and everyone was pleased.
Child 1 and I put on some homemade clothes for the occasion, and she added the little hair decoration my mom made for her.
After everyone who was going to come had arrived, it was time to do the scavenger hunt.
Fairy Hunt
The most enjoyed game we had at last year's party was a scavenger hunt, so to simplify the party we cut the other games and put more work into the scavenger hunt. We formed three groups of the kids we knew were coming, and figured out three non-overlapping hunts each with 6 or so stops on it. Becky did an amazing job visualizing places in the neighborhood (of course we were doing this late the night before) and composing rhyming clues and puzzles to direct each group to it's next stop. The idea was that as each fairy was found, the child whose name was on it would claim it and also read the clue for the next stop.
My mom typed up Becky's clues on the Corona 5TE, and each clue was curled around a felt fairy's arm. The groups of fairies were divided up into three bags.
Becky ran around the neighborhood planting the fairies with clues attached in their places just ahead of the kids at scavenger hunt time.
I went with the oldest kids' group.
Reading a clue.
Doing a puzzle for one of the clues.
Cakes
I made two cakes, about the same size, both with strawberries layered on and whipped cream frosting.
Child 2 wanted a chocolate cake, which I made from my go-to non-butter choc. cake recipe, from Smitten Kitchen.
Child 1 wanted the vanilla chiffon cake which has become a standard at our house, and which I think is fantastic. The cake layers were made the weekend before the party and put in the freezer. On the day of the party they were trimmed, filled, and frosted.
I made up some paper flowers to top the cakes from this book, which did not turn out that well but looked fine on the cakes and made them look more elegant.
I've been trying to do gelatine stabilized whipped cream for frosting for years. Usually it has not turned out very well, with the most common failure mode being clumps of gelatine in the frosting and a lack of stabilization. The last few times I've done it though I have been homing in on a good result. This time it worked perfectly. Here are a few tips I've discovered that seem important to me:
mix the gelatine into a small amount of cold cream, and let it swell for a few minutes before starting to heat it
use confectioners sugar to sweeten. Not sure how important this is, but I think the little bit of corn starch in the powdered sugar helps the process
after heating is done and the gelatine is dissolved, I leave the pot to cool on the counter and immediately start whipping the remainder of the cream. By the time I am ready to add the gelatine mix, it is at about the right temperature; still a little warmer than room temp but not hot.
The tricky thing is what temp to have the gelatine mix at when adding it to the nearly whipped cream. Too cold and it makes clumps. Too hot and it will impede the final whipping of the cream.
Everyone enjoyed the cake,
and there was a little bit left over, so the choice of batch size was just right.
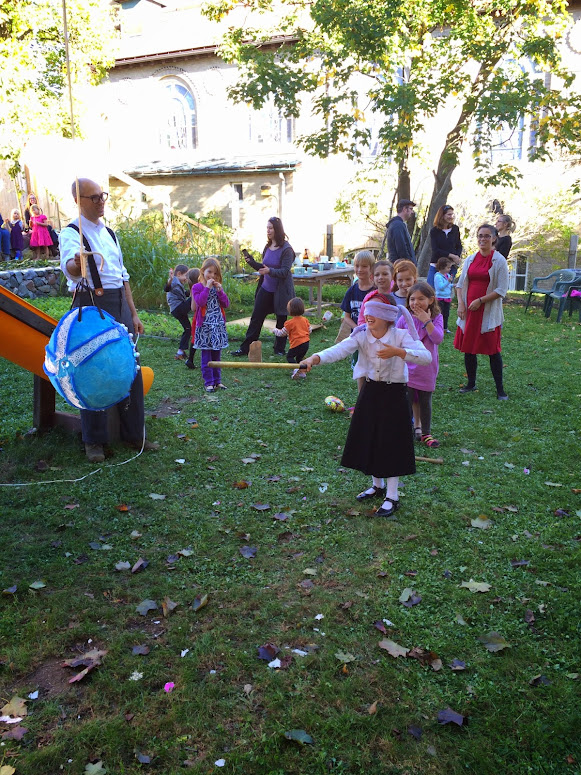
Piñatas
The idea was to make Faberge Egg style pinatas, which could also pose as potential fairy houses. Becky and the girls started with big balloons, layered on a few coats of paper mache, filled with candy and sealed up, then painted a base coat.
Then they painted and glued on decorations. Later, I added some hanging ribbons.
We put the pinatas on a line, which I operated, in order to handicap some kids to make the eggs last longer. Everyone got a few times at bat, then a bunch of lollipops.
Becky and I were thinking about how to get the kids learning how to type. Of course we have our main computer, but it is often in use by adults. One of the main thing the kids have enjoyed doing on it so far has been to write text and print it out. The process of typing to printed output on the computer is not terribly direct, and there is the overhead of dealing with windows and desktop, etc. The idea of a typewriter came up: they can easily operate it themselves and they can have unfettered access. I was also moved by the idea of getting another functional antique machine into the house.
My limited memory of mechanical typewriters was that the experience of typing on one is significantly different than using a computer keyboard as far as key travel, cadence, and actuation force. I thought perhaps an electric typewriter could be more useful for training towards a computer keyboard, but with the aforementioned advantages of a typewriter. In retrospect, maybe a mechanical would have been better, but what I in fact bought was a Corona 5TE in pretty good shape from ebay.
The Corona 5TE was the first "portable" electric typewriter. It was manufactured in the 50's and early 60's as a relatively high end home machine. It is heavy and almost entirely made of metal, and is a semi-electric version of a mechanical model of the same vintage. I don't have much basis for comparison, but to me it has a wonderful typing action and is a pleasure to type with. When we received it, the basic action was ok, but the shift function did not fully translate to the alternate characters on the type, and after a short while the impression made by the type became very weak.
My plan all along was to visit Cambridge Typewriter (in Arlington), and hang out with the proprietor while he gave the machine a once over. Tom Furrier, the guy who runs the shop, was willing to accommodate my request to be present while he looked at the typewriter, but it took some months to work out an appointment time that would work for both of us. One day I left work a little early and brought the 5TE to his cozy shop on Mass. Ave.
I've passed the shop a million times, since I bike past it both directions when commuting to work. But this was the first time I went inside. Tom has a slew of beautiful and interesting typewriters on display.
It is worth a stop in just to appreciate the machines on the shelves.
There is also big pile of machines in cases waiting for service.
Tom sat down with the machine and typed through the characters.
Within minutes, Tom had identified the source of the shift problem, which was that the curved metal bracket which lifts and lowers the whole type set (the "shift basket") had broken loose of its mountings, and also the rubber which it used to be lined with had petrified and mostly fallen out. He removed the leftover mounting tab on the left side (the right side mounting tab and screw were missing entirely), and in 5 minutes of rooting around in the back had a replacement part with screws, harvested from another machine.
This one was lined with felt and fit perfectly. I found it amazing that he a) had the spare part, and b) could locate it almost immediately. I would be hard pressed to pull off something similar in my basement crammed full of junk, er I mean valuable technology artifacts.
Now Tom moved the machine in back to his work bench. I chuckled when I saw that he had worn a hole in the masonite lining the top of his steel bench.
He says the hole started tiny and gradually got bigger, and that for a while it looked like the continental united states. I told him he was lucky it hadn't looked like the virgin Mary, otherwise he would have had a big crowd wanting to see it!
Tom stripped the machine down and removed the casing pieces lightning fast, and installed the new shift basket. One of the two belts which run from the motor to the action was almost shredded, which explained the weak key strike issue.
Cleaning
The machine went into the small exhausted hood and was blown out thoroughly with compressed air. Then Tom went to work with paintbrushes and a can of his general clean/lube formulation, consisting of 5 parts mineral spirits to 1 part light machine oil (presumably from the jug of sewing machine oil next to the hood). Using a few different brushes, he scrubbed and cleaned all the internal parts.
This machine is pretty complicated, and surprisingly heavy. Given the mass of the machine, I thought maybe it would have a cast iron frame. But it is mainly comprised of many, many pieces of sheet steel. There are hundreds of parts in it, maybe even 1000? It is a dense forest of tiny stampings, little springs, linkages, pins, and miniscule flat head screws. Trying to figure out exactly how it works boggles the mind.
All the mechanisms and the way they function together displays an astounding ingenuity on the part of the design and manufacturing engineers responsible for the product. It has a baroque beauty made all the richer for the fact that with some minor repair and tune up it works extremely well 50 years or more after it was made. How many of the things I have made as an engineer will be able to do the same?
The motor runs continuously. It is linked by a rubber belt to a speed down pulley, which is in turn linked by belt to a ridged shaft running across the machine under the keyboard area (visible below behind the key trip levers and springs; it terminates in a bronze bushing at the right hand wall plate).
The intermediate speed pulley has a suspension which allows it to float around to compensate for machine settings and wear. When a key is pressed, a hook catches the spinning shaft and is thrown forward toward the platen.
Tom says the motor should not be left on for hours on end if possible; that it would very likely overheat, and that replacements are not easy to come by. I thought I should probably set up a timer box to power the motor through, such that you push a momentary button and it turns the motor on, but shuts it off automatically after 30 minutes.
Tom said one belt needs to be straight rubber to provide stretch, while the other needs to be a cord reinforced belt. These belts are no longer made, but Tom had a board hung on the wall with loads of harvested belts on it, from which he found a good match for the worn out belt in my machine. He says if you use reinforced belts for both, the machine is too clunky and that you need the stretchiness of the unreinforced belt.
This dial under the front of the keyboard area shifts the hex shaft and much of the hardware under the keyboard toward or away from the motor, which affects the key trip sensitivity.
After the innards were cleaned/oiled thoroughly, Tom went to work cleaning up the housing pieces and key caps. I think I remember he said he used diluted Krud Kutter for this purpose.
Next, he sanded down the platen; the rubber coated roller which the type strikes against. This machine has a fixed spacing between characters of 2.54mm, so over time the roller develops grooves under where the characters are hitting every time. Additionally, the previously grabby rubber surface becomes hard and glazed. Tom used 120 grit paper and a practiced technique to recondition the platen, and with about 15 minutes of work it was smooth and rubbery again.
Tom spent about 2 hours, mostly on my machine, and gamely tolerated my peppering him with questions while he worked. I really enjoy watching an expert doing what they are good at in many contexts, and Tom certainly fits in this category. This was an excellent way to spend an afternoon, and the Corona 5TE is now purring and ready to type its way through a few more decades of useful work.
Typewriter Renaissance
While I was in the shop for a short time on a weekday afternoon, Tom fielded several phone calls and there were two people who walked in the shop. I mentioned that he seemed awful busy. He agreed wholeheartedly and said business is bustling to such a degree he can scarcely keep up. Tom says things were looking rather grim for the typewriter business there for a time in the 2000's, but now things have picked up tremendously. Custom from other businesses using typewriters is down, but interest in older machines from younger people is through the roof.
Put to Service
The kids have been enjoying having the typewriter out on the dining room table. Child 1 was interested to see how it works.
They like to type some text on a page and color some accompanying pictures either before or after.
They like to show it off to their friends too, who usually think it is pretty cool.
Becky used it to type up blurbs to put on a family tree poster her and Child 1 did for their history club.
My mom typed up the clues for our felted wool fairy scavenger hunt at the girls' birthday party last month. Child 3 likes to type "B" over and over again.
We spent the weekend in Maine making cider for the tenth year running, with Ben Polito, his family, and the many other characters who have joined in the fun. Ben's blog post on this year is here.
Apples
My family took our usual trip to Red Apple Farm in Phillipstown, MA the week before cider. My mom (visiting for a few weeks) came with us too. The kids love going here because its got all the non-apple stuff in spades:
goats
pumpkins
wagons
donuts, barbecue, hay rides, etc. No to mention plenty of apple trees, and less (relatively) crowds than places closer to Boston.
Its a fun time, and usually we pick something like 5 bushels of fruit. This year though, they had almost no apples on the trees when we went. They said they did not have a good fruit set, and people had come in from other places that had little fruit too, so relatively more picking and less apples. Plus we were a week or two later in going than usual. We picked every apple off a Roxbury Russet tree which had a decent load, and gathered some Golden Russet and Cortland drops. Only brought home about 2 bushels of apples though.
The Maine based contingent did a lot of work to prepare for the event. A trip was taken to Poverty Lane Orchard in NH to get cider apples. They also pulled out and organized the cider equipment, rented a porta-potty (great addition!), and got a bunch of other supplies rounded up.
I met Ben at Autumn Hills in Groton to gather about 550kg of mixed seconds, culls, and drops. In contrast to a number of orchards, Autumn Hills had a bumper crop this year, and there were still many trees in the orchard laden with fruit. That day started cold but by the time we were out collecting drops from under the rows of R.I. Greening, Yellow Delicious, and Mutsu, it had warmed up and was a beautiful morning. Ben snapped a pic of me eating an apple in my one pair of pants.
Here is Ben's truck loaded up with the haul from Autumn Hills.
New Labels
To mark the 10 year point in our cider journey, we decided to make up a new label. I made some initial sketches and put out some ideas on names and text, which were discussed by interested parties over email.
Jonah Elgart got inspired by one idea and made an awesome graphic. I did the layout and typography in Inkscape, in the style which I pretty much do everything. What can I say... I bought Garamond Premier Pro from Adobe years ago and I've gotten my money worth out of it. Here is the final design for the label:
I separated the colors into two PDFs and sent them to get made into magnesium plates at Owosso Graphics. Meanwhile, I had to figure out what paper to use. In the past we have used text weight paper from Paper Source for cider labels, but a couple years ago they made some change to their paper that for me at least made getting good letterpress results on more difficult. I have used Somerset paper, which is wonderful for letterpress, but only comes in big sheets and is expensive, especially after adding in cutting fees. So I ordered some samples from Legion of various papers I thought sounded promising. Ended up choosing 120 g/m Lettra from Crane, in Pearl. I found an online shop called Paperworks which would sell me 250 sheets of this paper in US letter size, with reasonable cutting fees to chop it into four equal sized chunks. A few days after ordering, 1000 label sized pieces showed up at my house for a final cost of about $0.07/label. Sweet.
I've got a drawer full of ink tins with many different colors of Van Son Rubber Base Plus leftover from previous projects. The black tin was too hard and dry to use, but I think the black is a little on the harsh side for most things anyhow. So I pulled out a crimson (PMS 200 ) and a dark gray (PMS 415). Here is Child 1 perusing the pantone guide to figure out what colors we had in which tins.
Got the press set up with the plates in the chase, paper holding pins positioned on the platen in a new tympan sheet, and some padding paper.
Child 1 applied ink to the press.
Then she worked it over with the rollers about 100 times. ("Dad! Seriously? 100 times??")
Fiddled around for a while getting the impression and ink level close to where I wanted them, then went to town.
Child 1 helped me treadle the press while I worked the paper in and out. There is a fair bit of printed area on the gray plate, so I had to ink the press about every 50 sheets and that was pushing it. The crimson was easier of course, being small in area. The platen was backed out a bit, and I think I only added ink one time. In all we did about 500 labels. Man, that Lettra paper prints like a dream.
Very nice.
One day while I was at work, the girls and my mom applied adhesive to 130 labels with our Xyron laminator, then cut apart labels and peeled front sheets to prepare the labels for use.
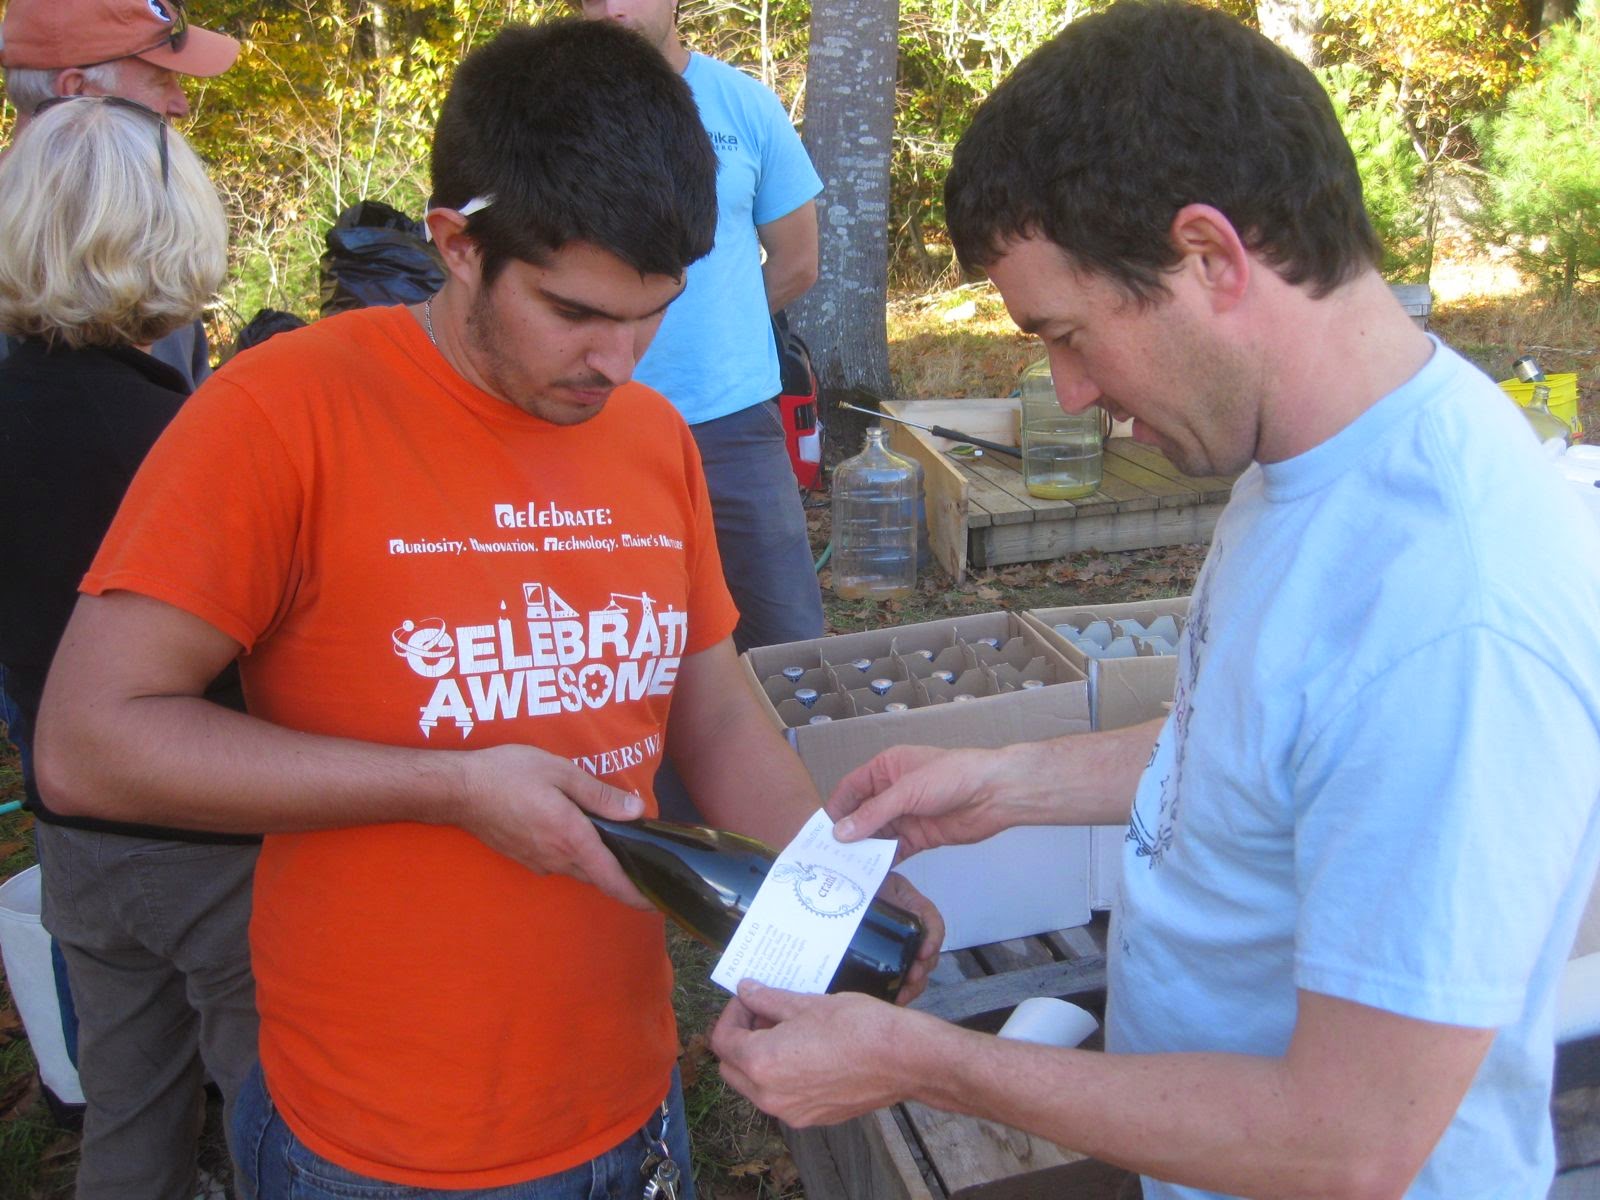
T Shirts
Mrs. Jones, a close friend of Alexis, offered to fund and execute a T shirt production run from St. Louis even though she couldn't make it this year. After some proposed layouts and email discussions, a T shirt version of Jonah's graphic was settled on, to be made on light blue shirts. The color of the clear fall sky during a pleasant day of cider making.
Alexis organized the sizes, numbers, and distribution after they came back from Mrs. Jones' vendor. They turned out great, and I changed into one after lunch on Saturday as Alexis handed them out. In this picture, we are working on the cornbread for dinner. You can see the jugs of sweet cider accumulating on the lower right:
Press Cloth Upgrades
Ben had the idea to rationalize the press cloths, which were a motley assortment of different sized cloth pieces. He located an older (1970's?) Kenmore electric machine and a home iron, and we decided on a plan of action. I forgot to bring my fabric shears, but Dave had some reasonably sharp scissors he loaned me for the effort. My mother, Kelsey, and I trimmed and sewed various cloths together to get 8 full size double thickness press cloths.
Food
My group made plans to supply most of dinner for something like 70 people, and we started cooking after lunch. Becky took canned beans, onions, garlic, peppers, and seasonings and made up an enormous pot of veg chili over a turkey fryer burner out the back of the barn.
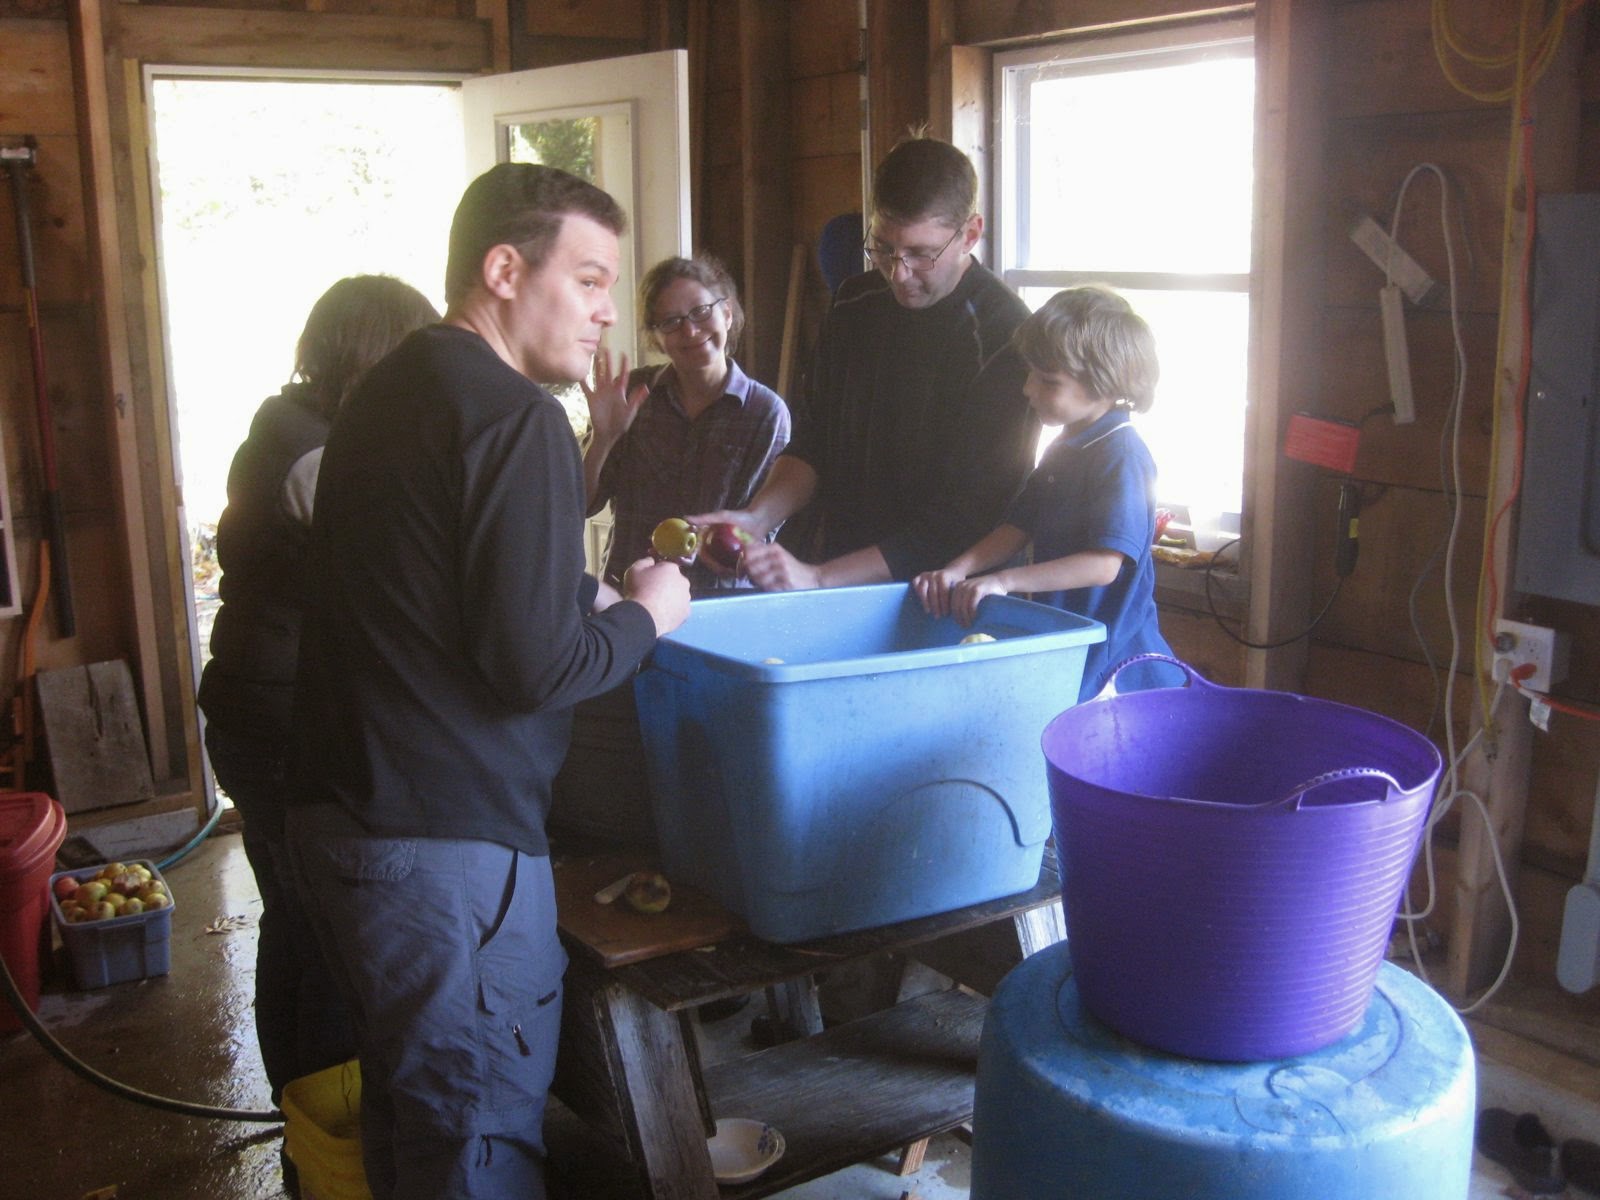
I planned to be responsible for cornbread and apple pies, and to prepare for that I made up 4 pies worth of partially rolled out crusts earlier in the week. Unfortunately I forgot these in Somerville, so we resolved to make apple crisp instead. Becky made up a 4x recipe of crisp topping from 2c oats, 2c flour, 2c sugar, and 2c butter, plus cinnamon and about 2c nuts using some emergency supplies rounded up by Emily. My mom took charge of directing a gang of kids to peel, core, and slice a big pile of apples using my antique Reading patent peeler.
Child 3 cleaning up after peeling:
In the end we made 6 pans of crisp, one with no oats or flour to be gluten free. Here is Child 2 adding cinnamon on top of the GF one:
These turned out nicely and there was a tiny bit leftover Sunday morning so the quantity was right. And crisp is so much easier to make than pie. I think I'll probably convert to crisp in future years since it significantly eased the hectic cooking scene.
I brought along blue flint corn and soft white winter wheat to grind on site to make the corn bread with. But somehow I forgot to bring my grain grinder! Luckily Ben's mom Emily came to the rescue with an old but still very functional Corona. My mom and a group of kids ground up 2kg of corn and 1kg wheat in fairly short order.
To prepare for an oven load of corn bread, I bought two relatively inexpensive 50mm deep and about as big as I thought could fit in a standard home oven and still allow for air circulation. I estimated the volume of these and scaled up my home ground grain cornbread recipe. After trimming some of the values a little, I ended up at the following to fill up each of the pans (so in total I used 2x these values)
1000g corn
500g wheat
150g chia
250g sugar
35g salt
80g baking powder
2c unsalted butter
1800g whole milk
10 eggs
I prefer my cornbread to be about 2/3 corn 1/3 wheat, and lightly sweetened. Of course it is a matter of taste. Here is my previous recipe on cornbread from home ground corn, which was scaled up for this occasion.
Not having a big stand mixer available, each recipe was mixed with a whisk in a big stainless bowl. First I put in all the dry ingredients and the room temp butter, which my mom worked in with her hands for a while. Then the milk and eggs were added and mixed well. The pans were lined with parchment and sprayed with oil, then the batter poured in. They were up to the brim full.
When I put them in the oven in Ben's grandparents' house, the batter started rising and I had to take out about 4c volume from each pan to make them not overflow. So next time I'll scale the recipe back by maybe 10% to something like this:
900g corn
450g wheat
140g chia
220g sugar
70g baking powder
1.5c butter
1600g milk
10 eggs
After scooping out some batter, baking proceeded smoothly at 200C (400F). I switched the pans from upper and lower racks and rotated them 180 degrees after about 20 minutes, and they were done in 35-40 minutes.
Many people commented on the great flavor, which was of course down to the fresh ground grain. A few pieces were left over and were eaten toasted in a skillet on Sunday morning. So the quantity was about right for the crowd of eaters.
Cider donuts were made and fried up just after lunch, which was very cool.
Dinner Saturday was served just as sunset was ending, in the big barn.
Tables were reconfigured and some clean up was done to clear the way for the meal. Heli also cooked up a nice pot of soup, and there were other odds and ends, and of course fresh sweet cider and last year's hard cider.
Dinner on friday was burritos at the lower cabin, materials and equipment supplied by Ben and co. and in greater part executed by Judith. Delicious breakfast burritos were made and furnished Saturday morning by Joshua and Kelsey, and Ben's parents turned out most of the lunch food with a giant load of Nebraska Cream Can Supper. Breakfast on Sunday was a mix of pancakes cooked in Ben's gargantuan iron skillet, a few odd potatoes, and assorted leftovers warmed up in the pan.
Cider
I was mostly not keeping up on the cider production itself, being occupied with press cloths before lunch and dinner prep in the afternoon. But things proceeded apace with enough people and skills brought to bear at the main stations to churn through the apples with enough time to clean up before dinner.
Cleaning
Grinding
Pressing
Filling
Bottling (last year's hard cider)
Labeling
Ben reports that we made a record 838 liters of cider, at 69% yield (pomace is weighed after pressing), which would indicate that we ran through about 1280kg of apples. Lots of people took home jugs of sweet cider and a few bottles of hard cider.
One of the numerous slick process streamlining tricks is to park the tractor right outside the window to the press area with it's bucket raised. Pomace goes right from the press, out the window, and into the tractor, which can take it to the compost pile when it is full.
Accommodations
We stayed in the lower cabin, where we have been bunking the last couple years. Friday and Saturday nights we had 8 people in there: our family plus grandma, and Alexi and LeeAnn. It was not terribly cold, but some of us were sick (especially Child 2), and we all enjoyed burning fires in the small iron wood stove when we were there.
I read a little from a book on Weeds from the 70's I found in the cabin, by kerosene lantern and headlight on Saturday night. It put forth the idea that it was important to know the different types of weeds so that you could figure out which chemicals to spray on them to kill them. Times have certainly changed, at least in the average person's outlook on appropriate vegetation control techniques (if not in actual agricultural practice).
Sunday
The bulk tank of soon-to-be hard cider was distributed into carboys.
We ate breakfast, helped a tiny bit with organizing, then had to get on the road back home.
I had (probably foolishly) signed up to take an official language assessment test run by the Taiwanese government at chinese school that day, and could not be late. We did in fact make it on time, barely.
That evening my mother helped me transfer my future hard cider from the plastic square carboys I use for transport into glass ones for fermenting, and I added sulphite to sterilize the juice. Meanwhile, I boiled about 1.5L of cider and cooled it to room temp. Transferred to a sanitized 2L PET bottle, then pitched a pack of red star Pasteur champagne yeast on it and added an airlock. This got going while the sulphite did it's stuff over the next 24 hours, then I divided the starter among the carboys and added airlocks to them. They are all off to a good start now.
Last couple years I've endeavored to pitch dry yeast right onto the carboys, but it usually does not work too well and I have to fiddle around to get them going. Despite the extra effort, I think the starter is the way to go.