December 23, 2014

Gingerbread Houses


We don't necessarily do gingerbread every year, but this year we did the full exercise and it was a good experience.

December 16, 2014

Maid Marian Dress


Child 1 said she wanted to be Maid Marian for halloween. I said Yes, let's Make it!


Fabrics
I had previously tried to make a dress for Becky on the 1910s Tea Gown pattern from sensibility.com. It used up a ton of fabric from the stash, in the form of a sea green grayish-blue length of fabric I had had for years, and the end of a bolt of white fabric originally bought for curtains. Both in a cotton/linen blend.


Unfortunately, the pattern just was not a good match for Becky's body, so all the pieces have been sitting in the cupboard. I thought this would be a good color scheme for a Maid Marian dress, and a way to use up much of the fabric from the chunks of the tea gown.


Design
First, I made a sketch, and took some body measurements from the customer. Child 1 thought three decorative buttons on the front bodice would look good for final trim.


Next, I made up a rough pattern and a bodice muslin from the measurements.


This was adjusted until it looked reasonable, then taken apart and made into a pattern. I went with a princess seam design on top, with the seam delineating the border between green and white fabric in front. The bodice is fully lined with a white fabric version of the design. The sleeve pattern I just sketched up from measurements; it is very like the sleeve used in the Regency Girl's Dresses I've made before in both pattern and construction.

All parts were then cut in real fabric, with seam allowance added.


Assembly
I started putting the pieces together.


For the skirt, I didn't bother with a pattern. I just made the pieces a bit longer than needed and as full as I could given the fabric pieces I had to work with. There is a partial coverage green overskirt, and a full white underskirt. I ended up hand hemming the green skirt, since I thought it would look significantly better.


The back closure is three buttons on the bodice, linked to a simple placket in the skirt sections. I need to overcast the inner edges of the placket; they started raveling a bit last time this garment was washed. Buttonholes were cranked out with the Greist on the Singer 99, how all our buttonholes are made these days.


I think the sleeves turned out well too, and I do like this color scheme and fabric.


Headpiece
My sister Annesly was up for a visit a few days before halloween. We love it when she comes to visit!


One of those days I took as vacation and we worked on costumes all day long. She took on the hairpiece project with Child 1. It consists of a core of the white fabric formed into a head ring, spiral wrapped with a sea green strip. A length of silk gauze I had completed the look when knotted around the band.


It looked good when they were done with it. Child 1 wanted to use the library bag she made earlier this year for candy while trick-or-treating.


In action
Child 1 was very happy with this costume and couldn't believe how good it looked. I'm happy how it turned out, and also with how making it went so smoothly. That is not too common an experience for me on sewing projects I must admit!

She asked me to be Robin Hood when accompanying them on the trick-or-treat rounds. The last few years I have not had a costume at all; the kids' costumes seem to use up all the time and energy I have to spare. But Child 1 really wanted me to be Robin Hood, so I ordered some cheap green wool blend felt from Prairie Point Woolens, and quickly made myself up a robin hood-ish hat.


In case anyone is wondering, I made that plaster cast of my head when I lived in a garage in central square in my 20's, which perhaps I'll blog about another time.

The original purpose was to serve as a form for making technological attachments for myself, but now it sits on our bookshelf in the living room. Sometimes the kids color on it or talk to it as if it is me. It does come in handy for millinery.

The feather is from a bluebird. I borrowed it from the wind chimes the kids made last time we visited my mom in Oregon.


I made some little boot toppers from green felt, and glued more green felt around a hastily constructed arrow sheath.

Child 1 wore a stretch knit long sleeve shirt and thick tights under the dress to provide more warmth while outside at night in the fall new england weather. Fortunately it was not too cold. Here she is enjoying the spoils.


She has actually worn the dress on several occasions since halloween, which is gratifying. It is a nice dress, aside from being a good costume, and fits her well.

December 11, 2014

Attempts at a 50 year fence


Last year when we did our backyard renovation, I put a lot of energy (and cost) into the back fence. We are planning to espalier apple trees against the fence, and the 10-20 year life expectancy of even a pressure treated fence post did not seem compatible with this idea. Replacing an in ground 2.4m post with apples grown all onto the fence sounds difficult and probably damaging to the trees. Dwarf apple trees might last 50 years, so I began thinking about how to build a fence that would have a comparable life span, or at least make replacement of fence elements less disruptive.

December 5, 2014

Vampire cloak and waistcoat in cashmere and silk


Child 2 is really into vampires these days. She draws pictures of the whole family of her friends, but as vampires. If she draws a person in a picture, they will often have fangs. So for halloween, she drew a picture of the vampire outfit she wanted to wear.


Design
She told me it would be a black cloak, over a red vest and white shirt, black pants, and plastic fangs. I said I could do that. I took some measurements and made up a tube of muslin, from which I pinned down some seams and gradually modified to fit reasonably.


Here is the sketch with body measurements I used to get started on the vest.


Kind of a rough pattern to semi-draping approach I suppose.

For pattern development, the cloak didn't need to fit tremendously well and it is simpler, so it went fairly quickly. The waistcoat got more time since it wanted to fit more closely. Child 2 wanted to do her own fashion sketch on a scrap of muslin.


The muslins got taken apart and used as patterns for the real fabric.


Materials
I didn't really want to buy new fabric for this project, and I have a mental problem wherein it is difficult for me to do something quick and shabby, even when that is the right thing to do. Not doing a project in a quality way makes me feel a little bit like my soul is being torn. This drives my wife nuts, and does impose extra costs in many situations. Anyway, in the case of this project, this meant making full linings and finished seams, and using high quality fabric. I hate the feeling that I'm spending hours and hours working diligently on a project using poor materials.

I like to keep some nice black wool or cashmere suiting weight fabric around, to make skirts, pants, etc. Last year I tried out a piece of super 130s cashmere/wool blend flannel from this vendor on ebay. It is extremely nice stuff. I probably used $30 of wool on this cape, which is bigger than it looks if laid out flat.

For lining, I have a stock of 19 momme silk charmeuse. It is an absolute bear to sew with. It slips around against itself and the machine, easily working pins out of it (which leave visible holes unless using fine pins). It stretches wildly with the slightest force on the bias, but is hard to stretch at all along the weave directions. It snags on any little burr or splinter, and ravels ultrafine fibers off cut edges. But it does make a lovely lining if you can get it cut and sewn into the right shape.

For the red elements of this project, I bought a pack of acid dye from Dharma Trading, in Fire Engine Red.


I've never used acid dye before, so it was fun to try it. We followed the directions and used my big stainless dye pot on the stove. Here I am straining the predissolved dye slurry, to eliminate chunks.


Child 2 and Child 3 were eager to help.


It is amazing how the dye binds to the fabric to such a degree that the bath becomes almost clear again.


 In retrospect I should have gone with a more crimson type color, but that's what you get for not doing a test piece first.


The lining for the cloak and the outer layer of the vest were cut from this single length of dyed silk, after it was washed, hung to dry, and pressed.


The vest lining I cut from silk Fuji Broadcloth, which is a joy to work with and I felt would give more stability to the flimsy charmeuse outer fabric.


Assembly
The wool sewed up beautifully, as excellent wool always does.


 The charmeuse caused me no end of headaches. After finishing something with it, I try to tell myself to remember NOT to use it anymore, but I inevitably go back to it when I need a lining.


The fit was tested a few times during assembly. I drafted a ridiculous vampire collar in paper and we tried a few variations before Child 2 gave the go ahead on one. This was made with the black wool on the outside and black silk satin on the inside, with sew in interfacing in between. Came out pretty well.


Unfortunately the lining was cut too big and so was drooping down below the hem line. I tried to take some of it up at the top seam (hand sewn). But I overshot and now in a couple places the cloak hangs on the lining rather than the wool, giving the wool a slightly hitched up look. Grrr. Charmeuse..!

Next time I would put it together a little differently. I tried to take some shortcuts so as not to have to hand fell stitch around the whole hem of the piece. But what I should have done was to sew the inner wool hem bottom piece to the outer, with a fold where it was going to meet the silk liner, hand fell the silk lining at the collar, then hand fell the wool inner hem piece down over top of the silk, above the hem. Ah well, can't win them all. I could always go back and fix it...


I added buttons, a closure tab on the cloak, and a tiny bit of embroidery.


Child 3 doing some sewing on a scrap, before we set up the buttonholer on the singer 99.


Cutting the waistcoat pieces.


Sewing a bias strip on to finish the armholes of the vest.


Back view of the finished vest over the white shirt.


Halloween
We used the white shirt I originally sewed for Child 1 for Revels, which Child 2 has now inherited. The vest and cloak went on. Teeth were put in, but didn't last long because they were uncomfortable. Child 2 was very happy with the outfit. Here she is with Child 3, who was pleased with his boughten Darth Vader costume.


Child 2 enjoying the spoils after trick-or-treating


I suppose this one may not be that useful as a general purpose garment, but it turn out pretty well.


November 24, 2014

25 Needle Felted Fairies and 2 Fabergé egg piñatas


The girls and Becky started thinking about the combined birthday party in August. The girls wanted to do a fairy theme.


Thanks to LeeAnn Kim for many of these pictures.

Invitations
Becky, Child 2, and Child 1 watercolored each invitation individually on nice paper, then wrote out the invitations by hand. These were lovely, especially when taken as a group. Here are about half of them before they went out.


Felt Fairies
An idea was floated to make a little felt fairy for each guest child, as a party favor. The kids got really excited about this, since we have been perusing this book for a while:


Becky got some felting needles and blocks of foam to put roving on while poking it. None of us had done needle felting before so this was fun to do! She roughed out the process based on this needle felting book; each fairy consisted of head and chest made from a big bunch of organic wool I bought years ago to stuff dolls, needled into a ball,


one pipe cleaner for arms, and a foam cone from Michael's for a lower body.


The arms and cone body were wrapped in plain wool and needled in place. The decorations and clothing were needled on from a few packs of dyed roving Becky had bought some time ago for another project.


 Finally, little accessories were added like wands, staffs, acorn cap hats, and the like.


The girls did some of the felting.


Grandma helped out too.


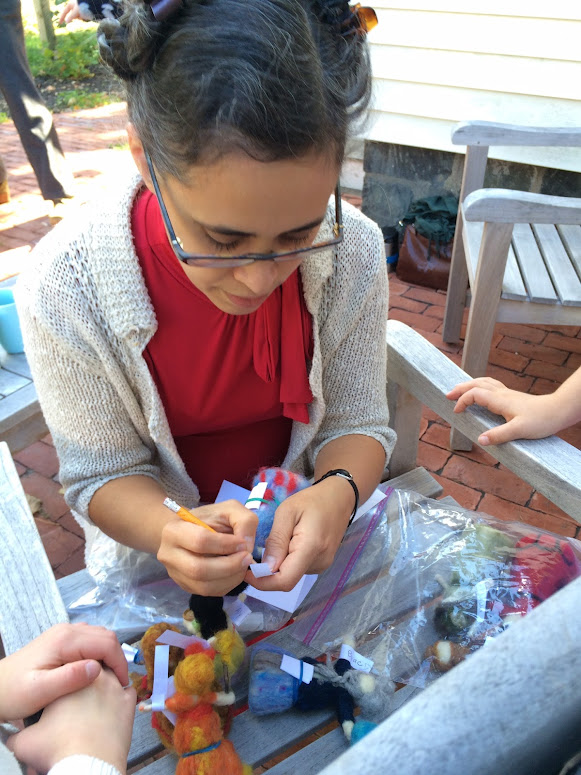
Child 2 kept poking herself with the felting needle, and was getting frustrated, so she instead worked on clothing design. It does hurt when one inevitably sticks the big barbed needle into the hand positioning the work, and we did want to keep the amount of birthday girl blood on the party favors to a minimum!

She worked with me to design the hair and outfit for her fairy.


Check out how I continued the seams from the gores in the skirt up into princess seamlines in the bodice.


One problem was that we needed a lot of fairies, but the first few took several hours each to complete. We put in a few late nights of frantic needle felting, and with some improvement with practice and enough hours, all the basic fairies got done.


Decorating them was definitely everyone's favorite part.


The kids decided which of their friends were going to get which fairies, and nametags were applied.


These turned out awesome, and everyone was pleased.


Party Time
We held the party in our excellent recently renovated back yard.


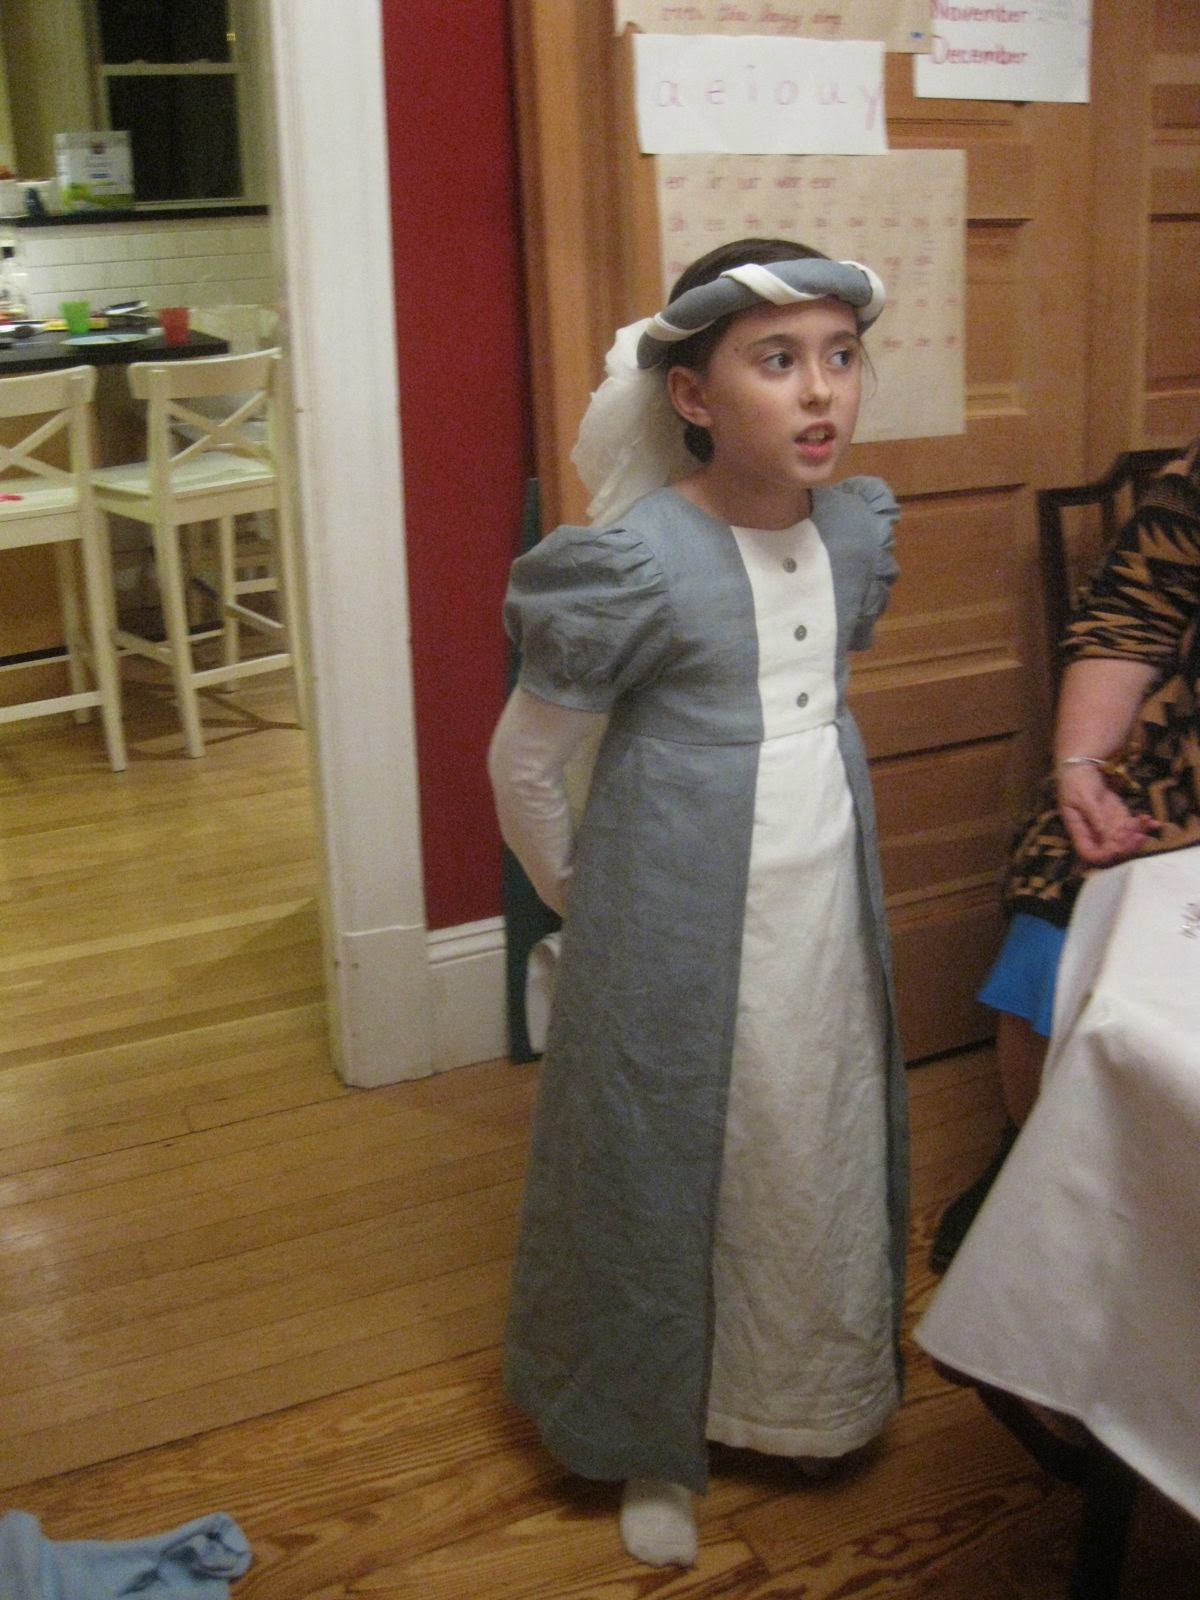
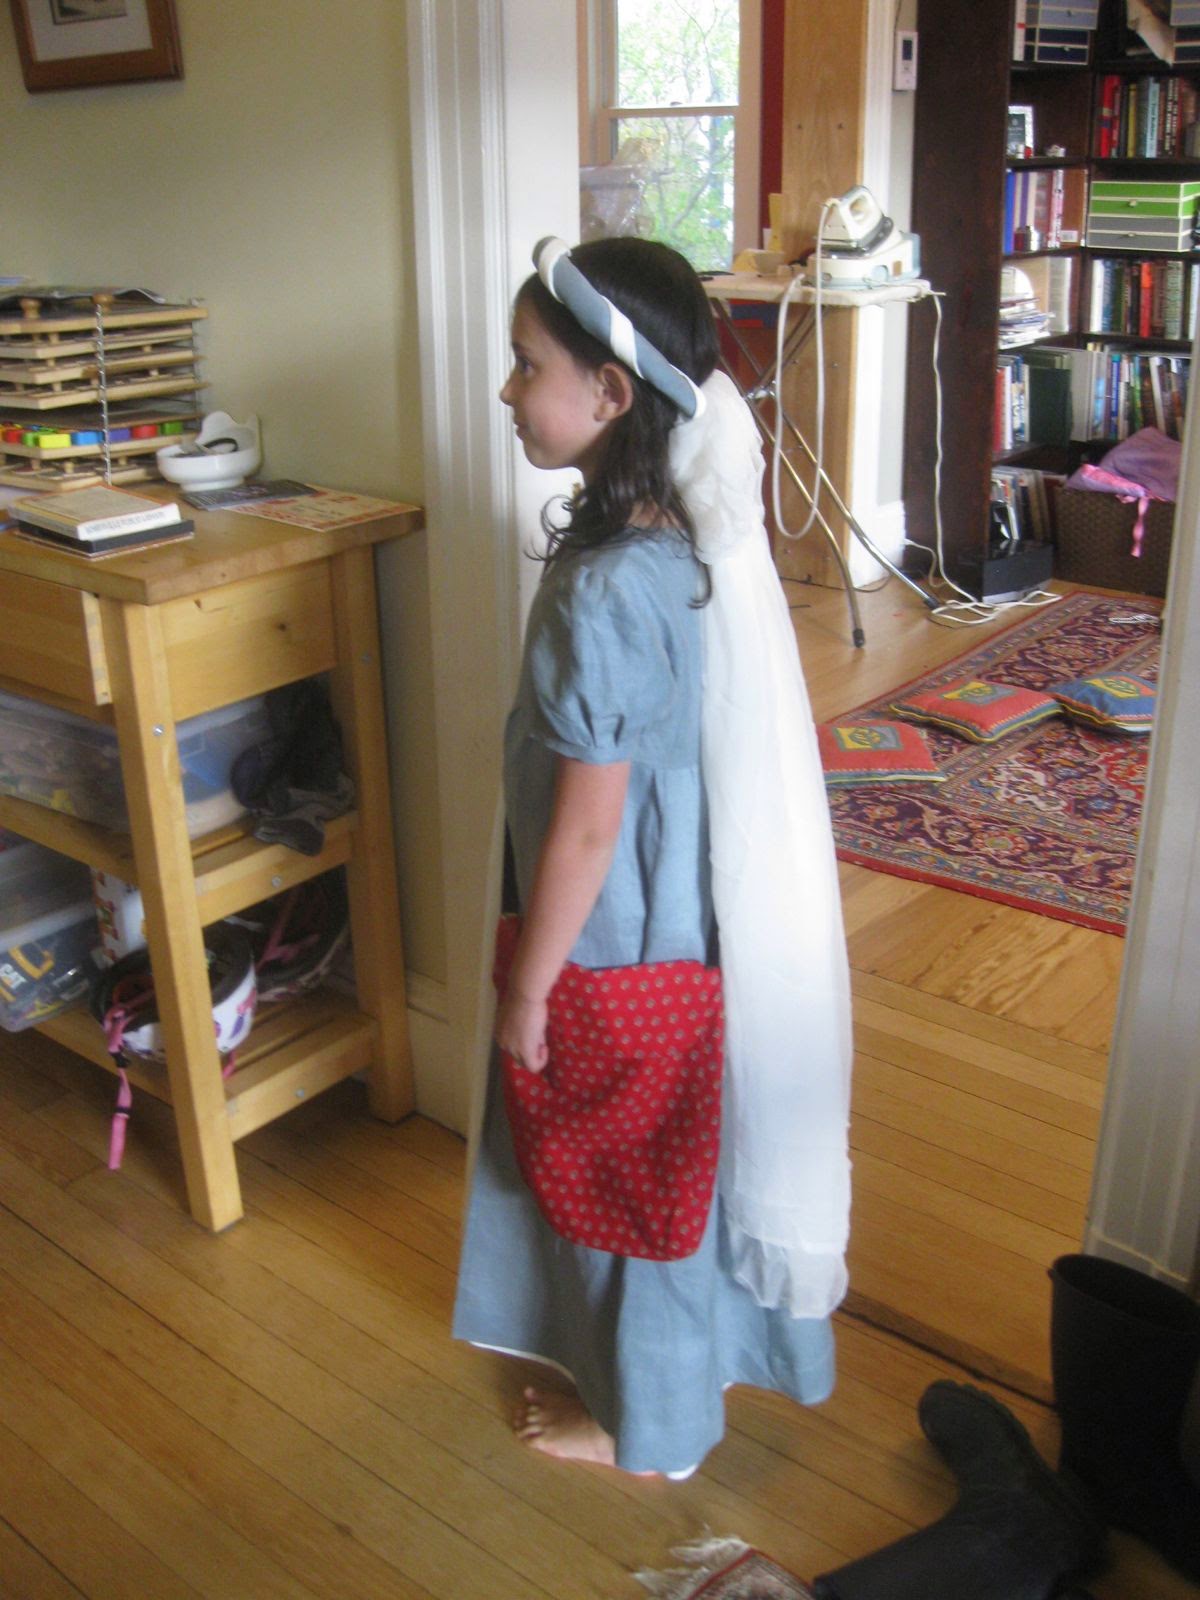
Child 1 and I put on some homemade clothes for the occasion, and she added the little hair decoration my mom made for her.


After everyone who was going to come had arrived, it was time to do the scavenger hunt.


Fairy Hunt
The most enjoyed game we had at last year's party was a scavenger hunt, so to simplify the party we cut the other games and put more work into the scavenger hunt. We formed three groups of the kids we knew were coming, and figured out three non-overlapping hunts each with 6 or so stops on it. Becky did an amazing job visualizing places in the neighborhood (of course we were doing this late the night before) and composing rhyming clues and puzzles to direct each group to it's next stop. The idea was that as each fairy was found, the child whose name was on it would claim it and also read the clue for the next stop.

My mom typed up Becky's clues on the Corona 5TE, and each clue was curled around a felt fairy's arm. The groups of fairies were divided up into three bags.


Becky ran around the neighborhood planting the fairies with clues attached in their places just ahead of the kids at scavenger hunt time.


I went with the oldest kids' group.


Reading a clue.


Doing a puzzle for one of the clues.


Cakes
I made two cakes, about the same size, both with strawberries layered on and whipped cream frosting.

Child 2 wanted a chocolate cake, which I made from my go-to non-butter choc. cake recipe, from Smitten Kitchen.

Child 1 wanted the vanilla chiffon cake which has become a standard at our house, and which I think is fantastic. The cake layers were made the weekend before the party and put in the freezer. On the day of the party they were trimmed, filled, and frosted.


I made up some paper flowers to top the cakes from this book, which did not turn out that well but looked fine on the cakes and made them look more elegant.


I've been trying to do gelatine stabilized whipped cream for frosting for years. Usually it has not turned out very well, with the most common failure mode being clumps of gelatine in the frosting and a lack of stabilization. The last few times I've done it though I have been homing in on a good result. This time it worked perfectly. Here are a few tips I've discovered that seem important to me:

  • mix the gelatine into a small amount of cold cream, and let it swell for a few minutes before starting to heat it
  • use confectioners sugar to sweeten. Not sure how important this is, but I think the little bit of corn starch in the powdered sugar helps the process
  • after heating is done and the gelatine is dissolved, I leave the pot to cool on the counter and immediately start whipping the remainder of the cream. By the time I am ready to add the gelatine mix, it is at about the right temperature; still a little warmer than room temp but not hot.

The tricky thing is what temp to have the gelatine mix at when adding it to the nearly whipped cream. Too cold and it makes clumps. Too hot and it will impede the final whipping of the cream.

Everyone enjoyed the cake,


and there was a little bit left over, so the choice of batch size was just right.
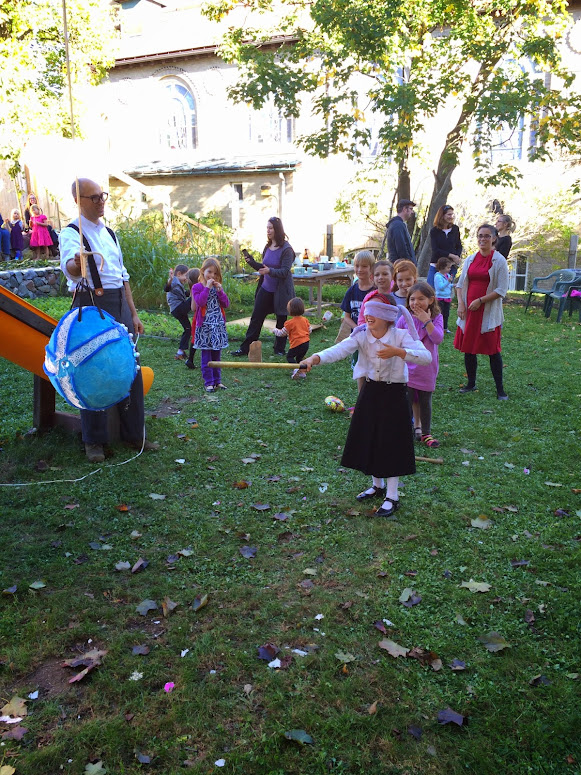


Piñatas
The idea was to make Faberge Egg style pinatas, which could also pose as potential fairy houses. Becky and the girls started with big balloons, layered on a few coats of paper mache, filled with candy and sealed up, then painted a base coat.


Then they painted and glued on decorations. Later, I added some hanging ribbons.


We put the pinatas on a line, which I operated, in order to handicap some kids to make the eggs last longer. Everyone got a few times at bat, then a bunch of lollipops.