

The antique exterior doors in my house have big brass and steel mortise locks in them. I like these units, and the doorknobs and plates that go along with them.
I've been working on two exterior doors these past couple years. The original doors and hardware were just too far gone to save, and I wanted to let more light in through a larger area of glass panes. We had new frames and doors put in (doors from Simpson, frame and assembly at J.C. Adams), with new brass hinges from Rejuvenation. But I had the door place not do anything for lock hardware. When the doors first were installed, I put in a modern deadbolt, both for security and to hold the doors closed while I figured out the lock situation.
On another replacement exterior door I had bought a lovely eastlake style antique entry mortise lock with matching strike and plates. This time I didn't see anything like that on ebay, so I just bought two locks figuring I could buy the plates and strike separately. I'm sure no one will be surprised to find that the knob to lock cylinder distance was not standard and I couldn't find any suitable plates. Bah! I even took the locks to Olde Bostonian and rummaged through their bins without success.
What to do?
They are not fancy, but I just machined some out of brass stock one Friday night at work. Stock was purchased from Onlinemetals. Locks were mortised into the doors with my trusty 'Maul' Tool co. antique mortiser.
Plates
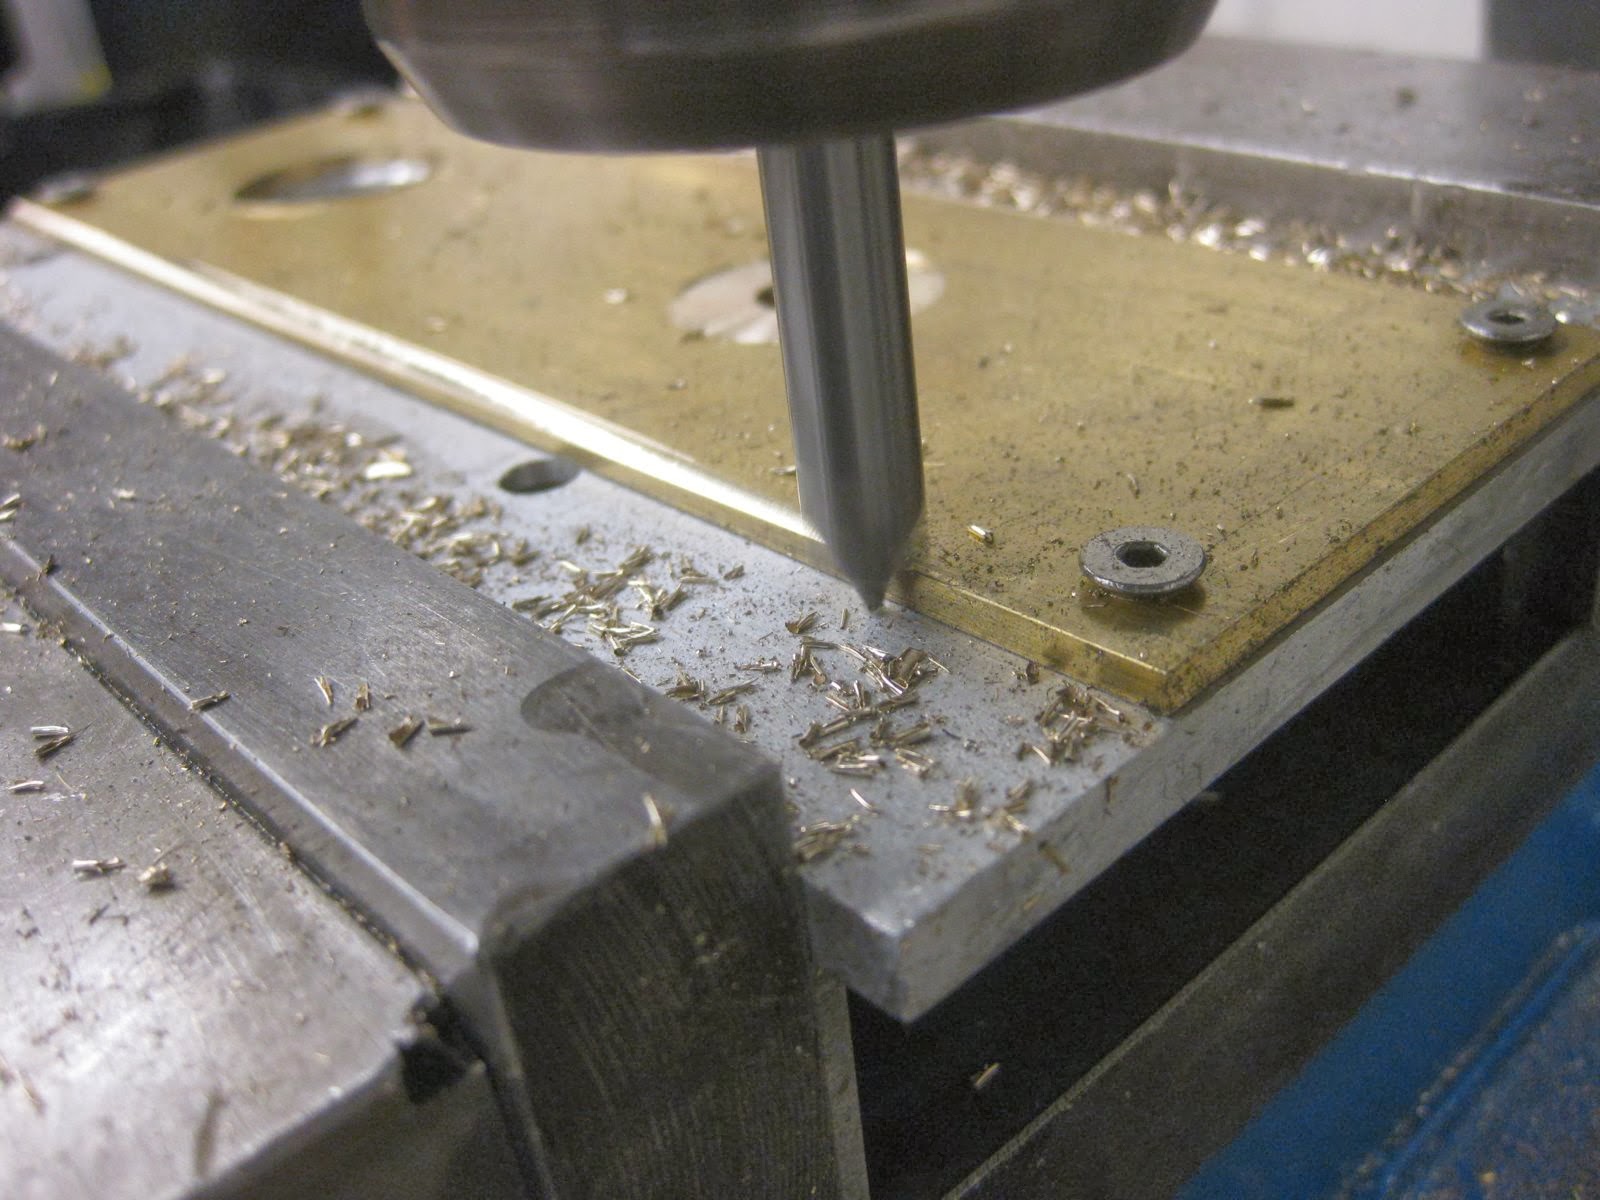
First I measured out what I needed and chopped it to size.

Next I made a little mounting jig from a piece of aluminum pulled from the scrap barrel.

Drilled the cut stock at the four corners, so I could screw it down to the fixture.

Real doorplates I have for exterior doors are a little relieved on the back, probably to keep the edges of the plate looking flush against the door. So I milled a little off the backs.

Also put in the holes for the cylinder and knobs.

Rounded the edges on the front with a carbide radius cutter I bought a while ago for making razors.
Then a little work with the sander and abrasive pad to finish it up.
Rosette bosses
The plates by themselves would work, but I wanted to dress them up a little.
First cut the stock to size.

Center drill the blanks.

Making a fixture to hold the pieces.

Stock mounted to fixture in lathe.

Outside turned down, now taken off the fixture and put in six jaw chuck to make the spindle hole and counterbore for the handle collar.

Finally, putting a concave radius on the OD.

Assembly
Dispensing some solder paste

Soldering on a hotplate, still mounted to the aluminum fixture. This hotplate is broken; it's not really at 450C! That is why I am monitoring with a thermocouple and handheld reader. Getting up to 200C does a fine job.

Strikes
I needed strikes for these two new exterior locks, and also for some interior door frames. Some of the old strikes had been filed out until they were no longer sound, and all are covered in a thick crust of lead paint.
Cutting stock to size

Putting in internal features

Notching to match old strike for interior door.

Bending the tab a little bit

Squaring up and trimming the interior cutouts.

Countersink and sand.

Nonwoven abrasive treatment.

Accelerating the formation of patina.

Final wax before installation.

Results
These turned out nicely. Classic looking, though not fancy. I need to bore out the outside facing rosette a little more to let the exterior knob collar come in a bit. The strikes are put in the normal way; i.e. with chisel, marking knife, drill, forstner bit, etc.

2 comments:
This is just the most amazing thing I've seen in a very long time. Good for you!
Post a Comment