

This project has been underway on and off for over 5 years. I finally finished the last few items and it is now 100% done!

All our bathrooms are 1.8x2.4m (6x8'), so it's tough to pack in a full tub, toilet, sink, and storage. All three bathrooms in the house are in a vertical stack, one on each floor, with exactly the same layout. The third floor bathroom is the first major project we did in the house after we moved in to it 12 years ago. The first floor bathroom was done over a few years while we were renovating and living in apartment 1. The second floor bathroom has been getting done in fits and starts on the same building permit as the kitchen renovation for apartment #2, and has taken me a lot longer than the other two did despite hiring out a bigger percentage of the work.
Before
The 2nd floor bathroom is unusual because it was originally just a nook at the top of the stair landing and was only later converted to a bathroom. I think I remember the guy we bought the house from saying when he was a kid there was a piano in the nook. By the time we moved in, it was fitted with wall to wall carpet, a mildewy plastic stall shower, and a rotting particle board console sink. Yeah, permanent carpet in a bathroom? Yuck.

When we eventually ripped out the carpet, there were some newspaper pages underneath from the 1940's. Makes you realize just how long that carpet had been soaking in delicious goodness from various sources!
The door was put into the opening of the nook, but this unfortunately made it so that it was too close to the wall with the toilet and hence had to open out into the hallway. During the renovation, we moved the door opening toward the other wall and installed a new prehung door opening into the bathroom. The light switch was relocated to be in the room instead of in the hall. Putting it in the hall seems to be very popular in the Northeast, but it drives me crazy for some reason. Probably just what you are used to.
I don't have too many before pictures, other than the one above. But here are some pictures of the third floor bathroom pre-renovation, to give you a sense for condition of my house when we moved in.


Demolition
On this project, I hired people to do the demolition, framing, plumbing, electrical, and plaster. This obviously saved a huge amount of time, though it still took me forever to finish it. I was very concerned about lead paint dust during the renovation; at the time of the demo we had Violet living in the house and she was about 1.5 years old. So I did my best to seal off the work area with plastic and lots of gaffer's tape, including building a plastic tunnel to the back stairs where the debris was taken out. There was a HEPA ventilator to create negative pressure in the work area.

We went away for the weekend when the demo mostly happened and made sure to vacuum with a HEPA vac when we came back, even though we were living in the other apartment at the time.
Rough
The subfloor was left in on this level, and after the demo new framing went up on the wet wall.

and the rough plumbing and electrical was installed

We did Icynene foam for the insulation, which is great for an old house since it seals up all the drafty cracks and holes in the exterior walls.

The first floor apartment has hot water radiators, so we put radiant in the bathroom floor when we renovated it. Radiant floor with marble tiles is a wonderful thing in the winter, in contrast to the freezing cold floor experience we had gotten used to from the 3rd floor unheated marble bathroom floor. So even though apartment 2 has hot air for heat, this bathroom got electric floor warming from the start. I put down a layer of plywood on top of the subfloor, then a Kerdi membrane. The warming system was put down and a few bags of self leveling compound were poured over it.

Then the marble was installed and grouted. I love small hex cararra tiles. Another nice thing about matte finish marble is that you can rejuvenate the surface with a palm sander, then reseal it.
While the ceiling was off, I did a tack up type installation of electric underfloor heating to warm the third level bathroom floor.
Tile
Long ago, a few friends from E Ink and I pooled our money and bought a heavy duty tile saw, which I heartily recommend if you have any significant amount of tile to do. This MK saw cost around $600, which was not a big deal when split 4 ways. I've used this saw to tile three bathrooms and two kitchens to date. This saw has a large sliding table, big water reservoir/catch tray, and a continuous duty induction motor. It is powerful, reliable, smooth, and quieter than the screaming universal motors in cheaper saws. On the downside, its heavy to handle by yourself, and tends to make a bit of a mess around it. The switch started to cause problems at one point, but one of the tool shareholders fixed it without much trouble. Here it is, set up in the hallway when Becky took everyone to visit her parents so I could try to make some progress on the bathroom. I think this was right before Child 1 was born, when I was racing the clock to get a functional toilet and sink on the second floor.

The shower walls in here got a layer of Kerdi membrane (over top of cement board). I found the Kerdi to be quite a bit harder to install than the paint on rubber I used in the other two bathrooms.

These bathrooms are fitted and finished nearly identically. Tub, sink, and toilet are all the same models from Kohler. Wall tile is 75x150mm white subway tile from Daltile, with a built up baseboard section using an inverted chair rail, and topped with chair rail and an accent strip.

The floors are in honed hexagonal mosaic size matted carrara marble, manufactured by Walker Zanger and bought through Tile Showcase in Watertown.

All tile was put in using freshly mixed thinset.

The other awesome tool to have if you are doing wall tile is a laser level and a sliding pole mount for it. This makes it easy to line each course up to a level line and space the joints properly.

Cabinets
In all these bathrooms, the tub is 1.5m long and positioned against the exterior wall, leaving a ~250mm space between the foot of the tub and the wall. The easy thing to do would be to just box this in, but storage space is at a premium so instead I've built custom drawers to fit in here. The window in this second floor bath has a lower sill for some reason than the other ones, so I couldn't make the cabinet as tall. Given its shorter stature, I only put in two drawers, each of which can accomodate two layers of toilet paper rolls stacked on top of each other for a total of 24 rolls storage capacity.

The carcass is made of 19mm prefinished plywood with maple rails mounted inside for the drawers to glide on. Drawers themselves are dovetailed maple, which I did on a router table with a fancy fence and some post cleanup with the chisel. In the first floor bathroom I ordered custom made dovetailed drawers, which saved some time. The lead time was long though, and I had to slot through the dovetails to make the drawer slide dadoes, which is troubling to me. Making them myself, I can of course lay out the dovetails so that one is missing where the drawer slide slot lands.

Here is Millie getting used to a block plane on a piece of scrap wood, drawers in progress to the left.

A special touch I've put in to all three bathrooms is using a salvaged carrara marble mantlepiece to cover the top of the tub foot drawer box and the windowsill. This is way cheaper than using a new fabricated piece of marble, and you can get more interesting edge shaping, plus it adds some character. This piece came from Olde Bostonian architectural salvage; I think it may have been something like $250. Of course you have to work it to the right shapes! Fortunately marble is exceedingly easy to work, as long as you are not going for polished perfection. I chopped it up with my dirty circ saw fitted with a stone cutting abrasive blade, then sanded it with progressively finer grits of sandpaper.

I like to wear a respirator when dry working marble with power tools, to better avoid silicosis.
One challenge I had on this piece was that I wanted to cut the windowsill with 'horns' on it, to try to improve the way I did the tile around the window vs. the other two bathrooms I've done in the house. But the piece was not quite long enough if I wanted to get the contoured edge all around. So I cut, shaped, and fitted a piece from the side of the mantle and bonded it to the main sill with clear epoxy.

I think that should last a good long time, but I suppose we'll find out. The join is pretty much undetectable unless you really look for it.

Medicine cabinets are made from 19mm solid maple boxes with prefinished 6mm plywood backs. Here is my embarrassingly cluttered shop in the basement with the cabinets in process.

Face frames and doors are made from the reclaimed, stained, heart pine flooring. These cabinets had to be fairly shallow since there are air ducts behind them for the third floor HVAC. Face frames are joined and attached to the boxes using pocket screws.

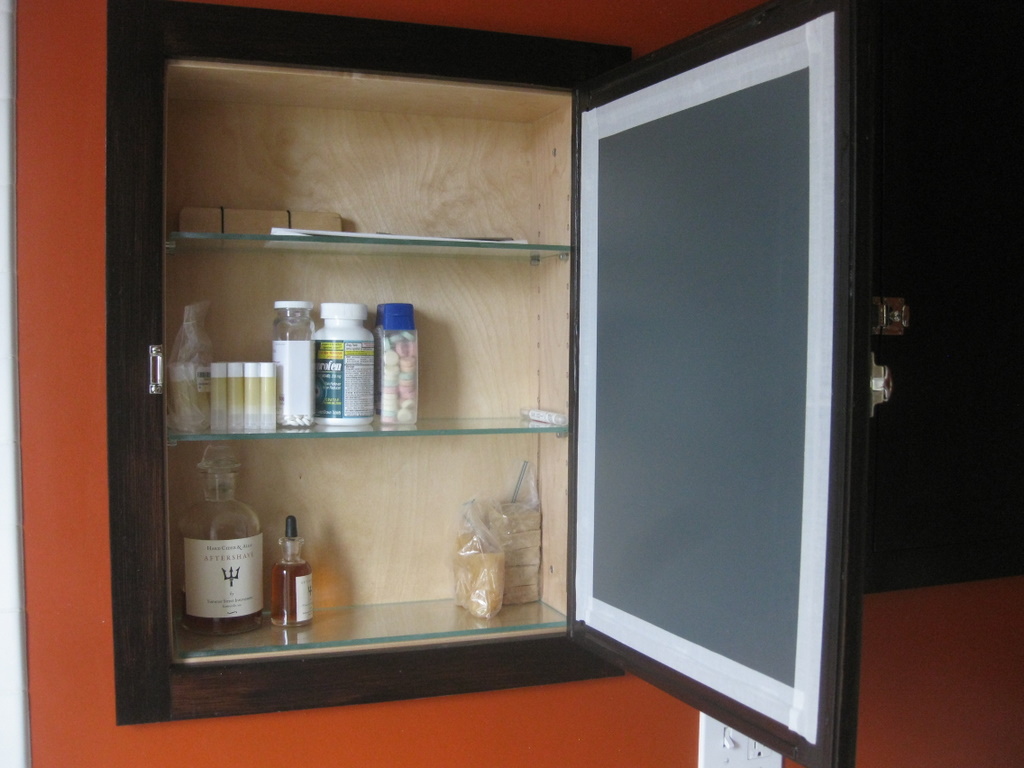
This is not our primary bathroom right now, so I'm using the medecine cabinet mainly to hold my straight shaving gear, and our stock of homemade chapstick. The glass shelves and mirror were custom cut at a local glass shop.

I left the back of the floating panel in the tall cabinet unstained.
Grates
I needed grates to cover the HVAC air duct, and the exhaust fan intake. I didn't have any spares from the house, so I got a couple antique cast iron ones from ebay of about the right size and had them sandblasted at a place in Everett. They were then primed and painted and installed into custom made frames. For the air duct, I fabricated a frame from a home depot marble threshold which I cut up and rabbeted on the tile saw. These were sized to the grate and installed with the wall tile. Later on I had to add some blocking in there to catch the screws through the grate. Turned out nicely.

The fan intake is right above the shower. For this one, I made the frame from some 12mm poplar window stop molding I had in the basement. There is a rabbet on this one too, so the grate can sit flush with the frame. The frame was primed on all sides, caulked at the seam to the ceiling, and painted.

Door
As I mentioned above, the door was scooted over and replaced with a new door. The old one was a junky hollow core luan door, so I was eager to replace it. One issue was that due to the multiple wall building incidents over the life of the space, the prehung frame was thicker than the wall on one side, and thinner than the wall on the other side. This required some tricky cutting of tapered jamb extensions and a lot of hand planing to sort out. There were also some trying situations to face on the floor in the door area but I won't bore you with the details.
The door itself is a solid 5 panel interior door made by Simpson, finished with vertical grain fir veneer. These doors are not quite as thick as the originals in my house, but they look and feel very similar. The molding on the bathroom side is cherry, and it and the door are both finished in shellac, gel stain, then two coats of satin water based acrylic. The hallway side of the door is finished similarly but with no stain, surrounded by painted poplar molding in the same pattern. The molding is from Anderson McQuaid in Cambridge.

I got the door with no hardware installed, and mortised in an antique lockset from another area in the house using my Mall Tool Co. mortiser. The inside cover with thumbturn is from Rejuvenation.
One issue with the door hardware is that my antique locks are supposed to take a key from either side, rather than a square shaft from a thumbturn. Even if I had or could make the fitting key, the key would get lost (especially with three little kids and their friends running around!). And with no key you can see through the keyhole. So what I did was mill a hole through the outer housing of the lockset to permit the thumbturn shaft to come through. Then I fabricated a piece of aluminum to sit on the square shaft and engage the bolt. I also had to modify the detent plate shown over the aluminum piece in the right hand picture below. It works, though its not the smoothest thing ever. Could probably use a little more fine tuning with the file, and if I was smarter I would have made it in brass. Ah well, maybe I'll do a better job next time.


Light fixtures and towel bars mostly from Rejuvenation. Here is Millie practicing stropping a play kitchen knife on my strops hanging from the glass towel bars.

It is so satisfying when you are done, really done, with a project. There are a number of things that didn't turn out perfect in this bathroom, that I might do differently if I could do it again, and even some things that will probably need some attention in a few years. But overall I am pretty happy with how it turned out.
5 comments:
Congratulations, it looks great!
What a splendid looking bathroom! Sadly, ours looks a bit more like your original one, minus the carpeting... ;)
Fabulous work,so impressive. I'm beginning to think there is nothing that you cannot do.I really like the grates you recyled,the tub drawers and marble top and sill that were also recycled. I posted after this was put up but think it got lost in cyberspace. Everyone seems to be in bathroom reno these days at least around here. We updated two 70s era ones a bit with new paint , plumbing and stone and my daughter is having both of her upstairs ones gutted at the moment. The results like yours are so worth it when looking at what was there but so satisfying to see the after. I know you all are just thrilled with the beautiful new bath. Our first started with company and a leaky shower head and it spurred me on afterwards to get the master and bath remodel also moving-traumatic all that mess here for me and the work omg for two old folks just to move out and do the paint work which was our only part though a lot of work. Kudos for all your skill and efforts.
Hi, great bathroom! We are doing something similar with the hex carrara floor and white subway walls. Did you use the Dal Tile White 100 or Arctic white subways?
Thank you!
Thanks. Pretty sure we used White 100 as the color for the Dal Tile subway on the walls.
Post a Comment