

Becky thought up the idea of kite making as a fun activity for the kids to do with some friends at a scheduled meetup, so I began researching kites that can be made quickly and cheaply with kid friendly materials.
I have long had a kite making book on the shelf called "25 Kites That Fly," by Leslie L. Hunt, published in 1929. I had always figured on building these kites with my kids someday, but now that the time was nigh and I started poring over the text, I started having second thoughts. The instructions were not entirely clear to me as a novice kite maker, and the book is sorely lacking in diagrams. Also, given the vintage of the book, the construction techniques focus on complicated lashing and string work using knife split wood from orange crates and the like. I began to feel that something better illustrated using more currently available materials might be more suitable.
After some surfing, I came up with the web site My Best Kite. This is a wonderful site run by a guy in Australia, and it has detailed pictures and simple, clear instructions on building a whole range of sizes and types of kite. I bought their $20 ebook on skewer kites, and I was happy to provide some money to the effort even though most of it could be pieced together from various sections of the free web pages.
The kites built on a 600mm basis (two skewers glued together), looked to be more stable and not need as much tail as the one skewer kites, so we tried those first. On the weekend before their friends were to come build kites with them, the girls and Becky and I built four test kites of differing designs to see which one might be the best blend of ease of construction and airborne performance.
On saturday, we glued up the skewers.

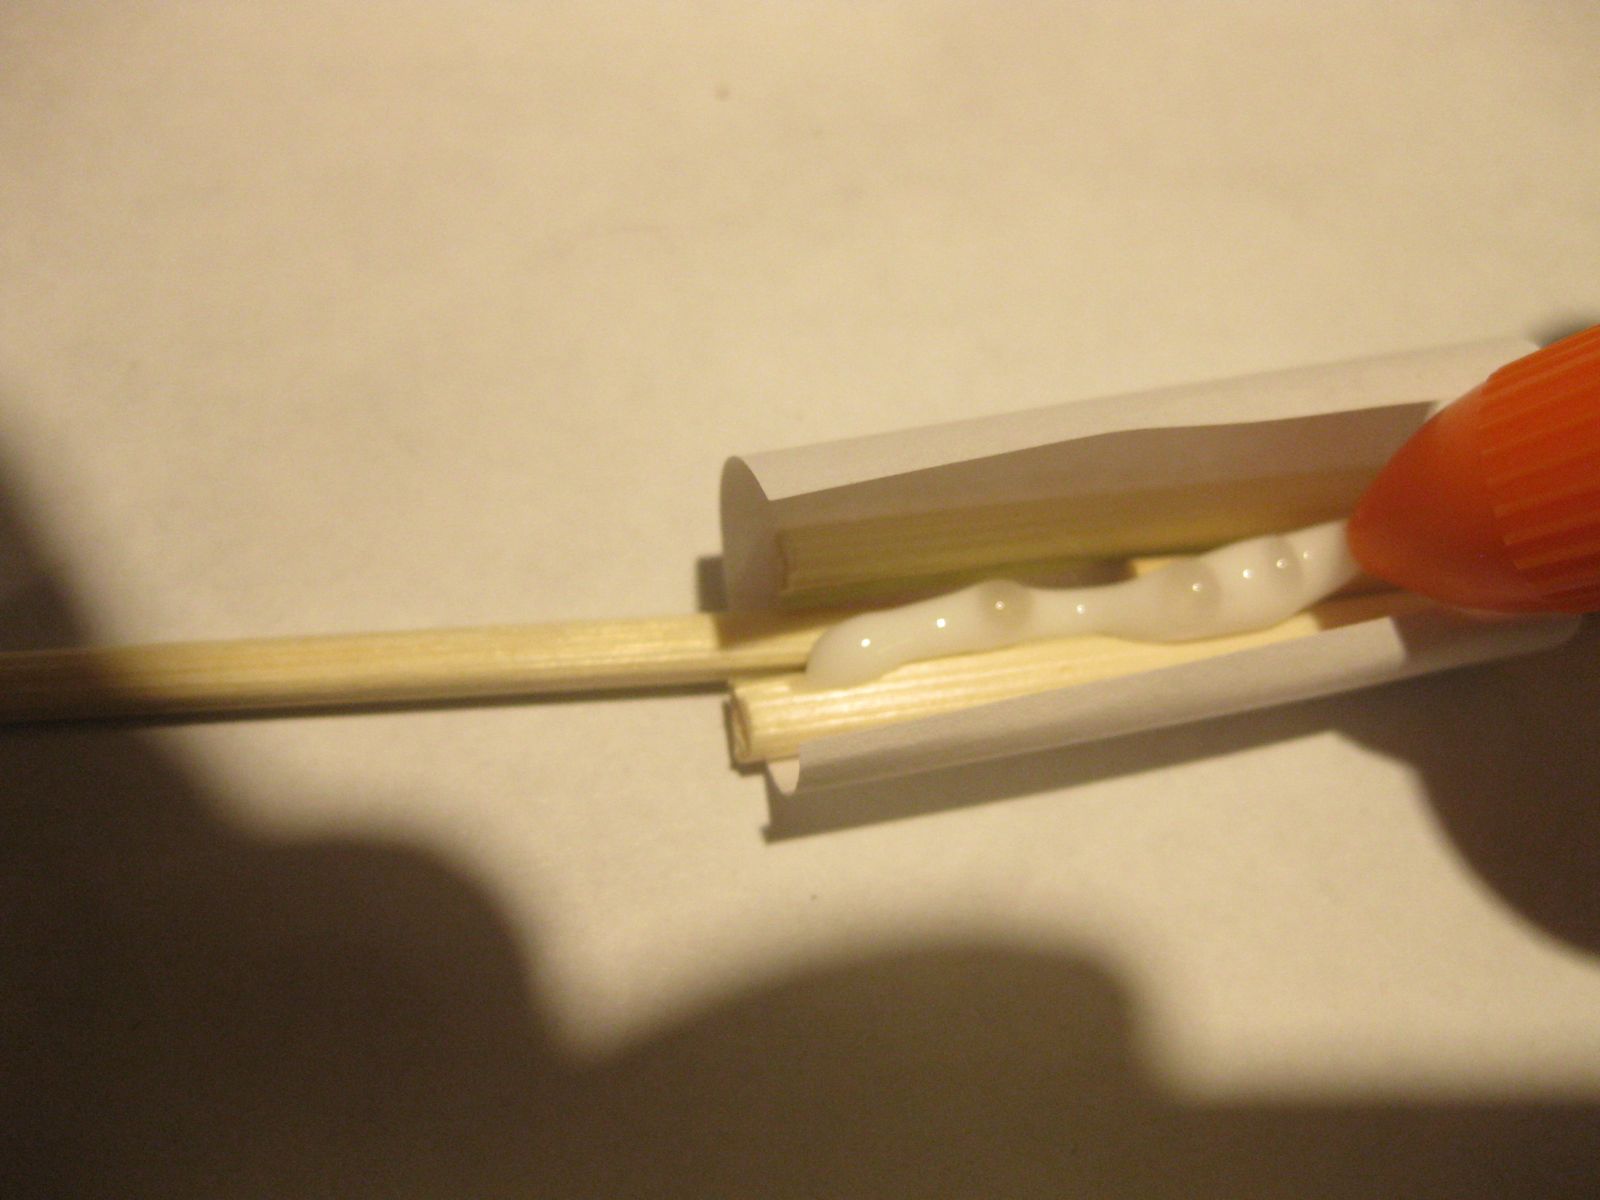
I adapted the technique from MBK to add a strip of paper wrapped around the joint, which I felt would help fixture the pieces while the glue was drying as well as reinforce the joint. We just used white PVA glue for this step.

Next, we cut out the kite patterns from paper.

MBK uses trash bags, which are surely stronger per unit weight, but I felt that they lacked romance. We made some kites from a roll of medium vellum I had bought from Amazon, and some from a big roll of white butcher paper I keep around for making signs, sewing patterns, etc. Both of these papers ended up doing well, so I think the only basis for selection would be what you have on hand or what you think looks better.

Violet and Millie decorated their kite papers.


The sails were strengthened by running a single layer of scotch tape around the perimeter on the back.

Next came the integration of the sail with the skewer frames. MBK uses electrical tape to fix the trash bag sail to the skewers, but I didn't want to see the tape on the front of the kites and also remembered the adhesion of vinyl tape to paper is not all that great. So we tried using clear packing tape.
First, trim the sticks.

Lay tape going from front of sail,

around edge, and onto back of sail

Trim extra tape

This ended up not working so well, with the failure mode being the skewer slipping through the tunnel of tape. An improved method is to add a touch of CA glue on the paper before laying on the skewer and applying the packing tape.
Now we cut some access holes through the sail for the bridle to attach. We first reinforced the area with a patch of tape,

then made the hole with a tissue punch.

The bridle attachments were tied through the sail to the skewers, with a dot of CA glue to keep it out of trouble.

Here are Violet and Millie's finished kites (tail removed from the triangle one). I realized I had made a mistake laying out the sail on the sled kit, so I extended it with some vellum paper.

I also made the barn door pictured at the top of the post, and Becky made most of this rokaku:

I had bought some 120m rolls of light kite string from Amazon, but they came on tubes, which I thought would be tricky for the kids to handle. We had stopped at the local Rockler in Cambridge to pick up some things, and the girls immediately noticed some purpleheart they had stocked and started going nuts about how cool it was. I usually prefer to use non-tropical wood, but in this case I happily bought a short length of this exotic wood to make into kite handles. Also in view are some drawers I'm making from maple for the second floor bathroom.

These handles were quick and rough since we didn't have a lot of time. We cut the Rockler board into 6 blanks, then sketched a shape on one with a pencil. This got bandsawn out to rough shape, then touched up a bit with the sander, corners eased with a small roundover bit in the router table, and a final sanding up to 320 grit with the sander. The first one was used as a template to trace the shape onto the others, and we quickly had some functional and decent looking kite handles.

Here they are ready for action.


I wound on about 30m of string onto the handles, and we took a trip to Robbins Farm Park in Arlington. Wind was very gusty, which was not great for flying kites, especially for us beginners. It would oscillate between so strong that it destabilized the kite, to so slow it would drop out of the air. Violet's triangle kite did the best.

It was probably too windy for the other designs, or they needed longer tails. We had but one long piece of paper crepe ribbon that we could move between kites we were trying. All kites were beat up pretty thoroughly, with numerous full speed crashes into the ground. I was amazed at how durable they were (after the skewer to kite edge joints were reinforced).
Becky reports that the kite making date went well, thought they didn't end up having time to fly them! Here are the other kites Violet and Millie did that day.

3 comments:
You're a fun daddy.
Thanks so much for this. My out of state grandsons flew kites here last year(we bought these) and we had so much fun with them. We lucked out and had a perfect day to put them in the air. They are returning in June and I am thinking up some fun and crafts for them so will refer to this and see if we can make the kites. What a great activity and the handles and the drawer construction you are doing are very impressive. I really enjoyed this post and found it very helpful and inspiring. This is such a great family activity-well done!
cool kite guys I love your creation
Post a Comment