March 20, 2013
Making Felt Hats
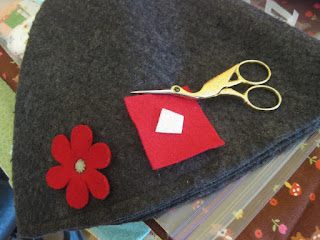
A few years ago I made myself a gnome style gray felt hat with a big red flower on it. It is my go to hat for cool to cold weather and I wear it frequently. The kids like to wear my hat too, and for some time have been asking to have tall felt hats of their own.
These hats are made from a charcoal gray wool/rayon blend felt made by National Nonwovens, purchased here (style TOY2003). When I first made my hat, I didn't have much experience with felt, other than knowing for sure that I didn't want the dryer lint-like garbage they sell as felt at the craft store. The National Nonwovens blends are affordable, came in many colors, and appeared to be reasonable quality, so I thought I would try it out. It turned out to be rather too thin for a winter hat, so I made two hats and nested them together. My hat has held up well over the few years I've been wearing it, but in future I think I'll try harder to work in 100% wool felt. Having used both the blend and all wool felt for dollmaking, it is abundantly clear that the 100% wool is a far superior product. It is stronger, better looking, more cohesive, and harder wearing than the blend, though it is significantly more expensive.
In my family, I'm mostly the one taking pictures and as a consequence I have few pictures of myself, and none with my hat on. But someone else took this picture of me riding the press bike with Child 1 at cider weekend 2011 with my hat on. Yes, I'm also wearing wooden shoes. This year a newcomer to cider weekend saw me in the same outfit and said "What's this? The cider elf?" What they did not know is that I look like this all the time, not just for cider!
A few months ago we embarked on making hats for Violet and Millie. I had a bunch of the wool blend felt left, so we just used that rather than buying new material. Though I'm not completely satisfied with it, I already have it and it has served adequately in my own hat.
Millie's Hat
First we made up a simple paper pattern from head measurements.
The base of the cone pattern is 1/2 head circumference plus a little extra. The height of the cone is taken from the location of the future edge of the hat up to the future hat tip on the side of the head. However, this hat turned out too small, so we had another go at it with increased dimensions.
Millie cut and basted together the halves of the inner and outer hats, and did a few of the whip stitches to join them up.
I stitched up the remainder, then spent some time steaming the hats to shape them and stick them together.
Then I sewed them together at the rim with the D-9 treadle.
I had a helper to turn the balance wheel when starting.
Millie wanted her hat to look exactly like mine, so I made another little flower applique out of nicer 100% wool felt and put it on.
Done!
And a happy hat owner!
Violet's Hat
Violet wanted to do her own decoration on her hat, so we put some of the blend felt in a hoop and she drew what she wanted to embroider on a piece of paper. I helped transfer the design outline to the fabric, then she embroidered it, which took about a month of on and off work by Violet.
We just used my hat as a pattern this time, but made it a little smaller with the same vertex angle at the top of the cone.
Violet cut out the pieces, pinned them, and whip stitched the inner hat. I did the outer one (the one with the embroidery). Once again I steamed the two hats together, then pinned them in place. Violet stitched them together with the Singer 99 handcrank.
She was very pleased with her design.
And very pleased with the hat!
Labels:
family,
human power,
sewing machine,
sewing projects,
vintage machines,
Wheeler,
Wilson
Subscribe to:
Post Comments (Atom)


2 comments:
Lovely, great, swell hats.
Thank you for sharing the story of your hat and hat making with your girls. I love knowing you wear your wooden shoes and hat most of the time! My heart skipped a beat and a few tears slipped from my eyes when I saw Violet sewing her hat. Such joy knowing that precious hand crank is being used to make useful and fun items for your sweet family.
Please keep sharing. You absolutely made my day!
Post a Comment