I bought some rough cut green oak from a local supplier early this spring, for making into some plant trellises and a little perch on a maple tree for the kids. Feeling that this by itself was not enough of a challenge apparently, I decided to try to do a bit of carving on the tops of the posts to make these installations more interesting.
Rather like when I tried to carve the transition pieces for the handrail on my back stairs, I quickly realized I am a terrible wood carver. When I'm trying to remove material, I'm constantly feeling like it is going poorly. I feel as clumsy as if I were trying to stack up marbles with chopsticks while wearing wool mittens. One thought that is difficult to banish is "If only I had a different tool this would be going better...".
With the handrail I ended up using a carving wheel on an angle grinder, but I wanted to try to stick with hand tools on this project. One issue was that the green oak in thick sections will quickly load up even a coarse coping saw blade. My carpentry sized ryoba does pretty well, but the blade is wide so it can't turn in a cut very much. A pruning saw does ok, but mine is not as sharp as it could be and the blade is still pretty wide.
I had the idea of using a bow saw type blade with gnarly teeth to do some of the rough material removal. Bahco/Sandvik makes some nice ones in 530mm length, available from Amazon. I bought one for green wood, one for dry wood.
Now we just needed something to hold the blade and tension it. I sketched up a frame for the blade in Inkscape, printed the parts on large paper and cut them out with scissors to make templates. You can download the SVG file here.
Some well seasoned beech wood was pulled from my stash and chopped to length.
Marked around the template pieces.
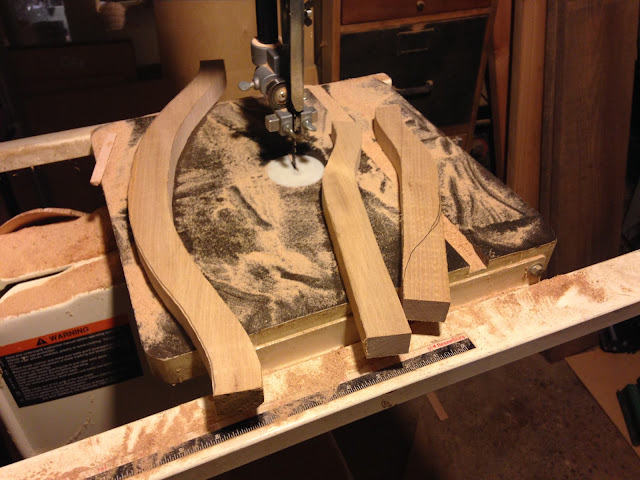
Roughed the parts out with the bandsaw.
Sanded the cut edges, eased the corners with the router, then sanded the faces
I made some through mortises using forstner bits on the drill press
followed by some chisel work.
The matching tenons were done with a dozuki saw
and a chisel to finish things up and tune the fit.
The fit and quality of the mortises and tenons leaves something to be desired, and I had cut the center brace piece too short to be able to make the tenons come all the way out the far side of the end pieces.
I made the best of it and figured it would be ok. I beveled the inside edges of the exterior side of the mortises to come down to the meet the end of the tenons, which makes it almost look like I intended them to be short.
For the top tensioner, I used some stainless 8mm OD tubing I had sitting around, which took a nice internal thread for an M6 flat head stainless screw.
The blade is retained with some stainless dowel pins, which fit snugly in cross drilled holes in the wood.
After some test fitting, I finished the three wood pieces with three coats of Waterlox.
The blade actually stretches more than I had anticipated and I had to cut the tension tube at the top a little shorter. Still could use more trimming in fact to get more tension, but the shorter it gets the more poorly the tenoned center brace fits the side pieces.
How is the performance? Well, I quickly determined having this saw is not making me better at carving. Ugh! But on the plus side I have a handsome homemade saw hung up in the shop, and Child 3 had fun doing the project with me.


