

Haven't posted in a couple weeks; I really wanted my next post to be a sewing post, but I've been struggling to finish the project I wanted to show. It is a skirt for Violet, which I am almost done with, but for a few last buttons and buttonholes.
In the meantime, I thought I would show the suspenders I made to hold the skirt up. I have been working on and off on a pair of high waisted pants for myself, to be held up with braces, and Violet had the idea that she would like a skirt with suspenders to wear with the white shirt I made her last December. I'm hoping I can finish the skirt before she grows out of the shirt!
I have been thinking about the best way to do home made suspenders for a while now, and it was great to be able to explore some of these ideas.
The current design consists of two independent straps, attached with buttons to the waist of the garment such that they form an X across the back of the wearer, then come straight down the front of the chest and belly. The circumference of a kid's waist is not so great that I though I needed to distribute the attachment points with the yokes you typically see on the front ends of typical braces, so I just went with a single big button in four locations around the waist.
Leather Bits
First came some initial messing around on paper, and with pigskin that I had around. Of course I had lots of help.

Next, I cut the real button tabs from 1.5mm veg tanned leather strip, purchased from Zack White to have around for just such occasions. The termination holes in the button slots were punched with a 2mm tissue punch, then the slit between the holes made with embroidery scissors.
That brings us to the Dubbin. This is an old school leather conditioner, with lots of sketchy recipes to choose from on the internets. I mixed up a 50g batch from materials on hand:
- 35g home rendered tallow
- 15g beeswax
- 10g orange oil

Ingredients were melted over a low flame in a pyrex beaker until well mixed and fully liquid.

This dubbin is probably too hard; perhaps next time I'll use a higher % of oil. But I used it anyway, by dipping the leather pieces briefly in the beaker with tongs, then rubbing them with paper towels.

We'll see what happens with them.

Hardware
The strap tighteners are stainless steel from Strapworks.com. This size (25mm) is good for a child, but rather narrow for manly braces. The next size up in stainless is 50mm, but these look a little on the big side even for my rugged physique (ha ha). The buttons are 19mm two hole metal, from ebay.
Straps
The easiest thing to do would have been to just use ribbon of the proper width, but of course I have to make everything more difficult and decided I wanted them to have the same gray wool/cashmere fabric as the skirt. Below, I am cutting strips of the fabric, with hardware and leather tabs to the lower right, skirt in progress on the upper right:


Below are a few sample straps I made. At far left is a strap made from two pieces of the wool fabric sewn together, turned, pressed and edge stitched. Next from left is a strap made from a single piece of wool sewn into a tube, turned, pressed, and edge stitched. Next over is a wool/silk sandwich, turned, pressed, edge stitched (you can see the seam running down the middle). And finally a piece of black ribbon and gray felt edge stitched together, on the right. The felt and ribbon was the easiest to do, but the felt was not a great match with the gray wool fabric.

The metrics for evaluation were: 1) looks, and 2) functionality with the strap tighteners. I ended up liking the wool/silk combo best, but I had to use a piece of ribbon for part of the tightener connection to avoid building too much bulk in the tightener openings. In the end I didn't edge stitch them, though I could still go back and do that later if it seems right.
Assembly
I sewed the straps with a doubled length of seam binding inside, to help with turning them after joining.
The wool and silk together are quite stretchy, which I think may be good for braces, but the silk thread I sewed them up with made them far less stretchy after seaming. So if they get too stressed during use it will very likely break the thread first, which would be unfortunate. Maybe I'll try to stretch the fabric more while seaming next time.
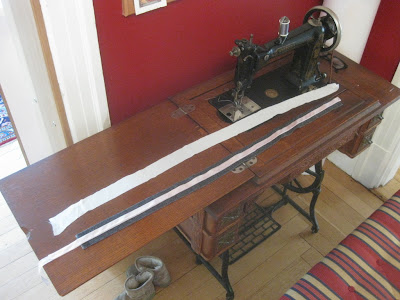
Turning went fine.

After pressing they looked decent.


The wool and silk together are quite stretchy, which I think may be good for braces, but the silk thread I sewed them up with made them far less stretchy after seaming. So if they get too stressed during use it will very likely break the thread first, which would be unfortunate. Maybe I'll try to stretch the fabric more while seaming next time.
Turning went fine.

After pressing they looked decent.

The raw edges were turned under at the ends of the straps, and on one side the leather button strap was trimmed, inserted and sewn in. Then the front side hardware was strung on.

My sewing machine had no problems at all sewing through the leather. This 1.5mm thick stock is not too difficult to poke through, especially after a dip in the dubbin, so I can't imagine any reasonable sewing machine would have any trouble.
Finally a small length of ribbon was run around the center bar of the strap tightener and sewn into the other end of the strap tube (returning from its trip down and through the front button holder assembly).

The tubes are a little long, so the strap slides are up and over the shoulders on Violet. Might have to shorten them a little. The upside of being long is that they can be slid down as she grows, so she'll still be rocking these awesome suspenders when she is 16. Right??!!

One disadvantage of the white bottom fabric on the straps is that when the strap is coming back up to the tightener slide, you can see the white underside a little from the front, which is not ideal. If I was smarter maybe I would have transitioned to the wool on the bottom side about when the strap turns around on the front side button tab. Also, the straps are a little narrow and bulky, but we'll give them a try. I've got plenty of leather and extra strap slides, so I can always make another pair!


One disadvantage of the white bottom fabric on the straps is that when the strap is coming back up to the tightener slide, you can see the white underside a little from the front, which is not ideal. If I was smarter maybe I would have transitioned to the wool on the bottom side about when the strap turns around on the front side button tab. Also, the straps are a little narrow and bulky, but we'll give them a try. I've got plenty of leather and extra strap slides, so I can always make another pair!

No comments:
Post a Comment