Showing posts with label bread. Show all posts

May 29, 2014

Converting to Natural Leavening for Bread


I've been baking bread for a few years, and always been a little interested in sourdough. But I generally don't favor the very sour versions you typically find labeled as sourdough, and the process seemed like a lot of extra work. However, I recently read Cooked by Michael Pollan, which has a section on bread that made me excited to try 100% natural leavening.


Pollan finds his way into the bread making orbit of Chad Robertson, of Tartine in San Francisco. He writes movingly about naturally leavened bread, and the elimination of a commercially sourced ingredient (instant yeast) from my list of inputs was appealing. An argument is also put forth in the book that bread made in this way has a significantly lower glycemic index and is digested more slowly by the body. This is how everyone made bread for thousands of years, until fairly recently. So I ordered the Tartine bread books from the minuteman library network.


Between reading the first Tartine bread book and a blog inspired by it called Girl Meets Rye, it didn't sound as difficult to build and maintain a starter as the impression I had taken away from various cookbooks.

Developing a Starter
I had a bag of boutique stone ground new england grown whole grain rye flour in the freezer from Wild Hive, which I more usually rely upon to add some flavor to my regular bread. Following the directions from Girl Meets Rye, which are even simpler than those in the Tartine Book, I began working up a starter using this rye flour.

All I did to begin was mix up an equal mass of flour and water in a small jar, and let it sit uncovered for a day in my kitchen.


The idea is that the organisms needed to eventually develop into a stable sourdough culture are already present nearly everywhere, one just needs to impose a set of environmental conditions that will favor the desired set of microflora. The first organisms are already in the flour, the air, and my kitchen, so no special effort is needed with assorted fruit mashes or juice mixes, etc., that are prescribed in other sourdough development systems.

There is sure to be plenty of bits of commercial instant yeast derived organisms floating in my kitchen, so the initial bubbling up of the rye mix was likely due to these. Soon things died down though, probably inhibited by the growing acidity generated by bacterial action.

I started doing the feeding routine, which involves removing most of the starter and adding back in an equal mass of whole rye flour and water. I just used tap water, though it is run through a carbon filter, so less chlorine than if it came straight from the municipal pipe. After things seemed to be well colonized, I moved to feeding twice a day.


Not too sure precisely what I was looking for, I continued the routine of feeding twice a day for about two weeks. The kitchen scale and a small bag of rye flour are left out on the counter close to the sink, so it only takes about 2-3 minutes to do a feeding and put the jar back on the top of the fridge where it spends most of its time.

For my first bread with the new starter, I made the Basic Country Loaf from the Tartine book and it turned out quite nicely.


 It was baked in a cast iron dutch oven, a great technique I had done many times already with variants on no-knead bread.


It wasn't as airy as the pics in the Tartine book, or one can find on the web. But I was happy with it. Here is our lunch that day: Fresh sourdough bread with butter, homemade fermented pickles, and homebrew kombucha. A real festival of foods produced with the aid of microorganisms!


Since then I have only used instant yeast one or two times for bread, if a need develops that I don't have time to rev up the starter for. I almost exclusively use the starter for all bread leavening, and now that I am used to it and have a system figured out it is really not that much extra work.


Maintaining the Starter
To cut cost on the flour used for maintenance feeding, I have moved to using Arrowhead Mills whole rye flour, which is available locally and is cheaper than the Wild Hive flour.

I keep my starter in a small canning jar, which weighs about 190g. To do a feeding, I put the uncapped jar on the scale. Including the resident starter, it reads about 250g


I scoop out starter with a big spoon until the scale reads 210g (so about 20g starter left).


The extra starter goes in the compost, then I add whole grain rye flour to get up to 230g


 then filtered water to get to 250g


I find with Arrowhead Mills flour that I think the consistency is better with about 19g flour and 21g water. Don't sweat it if the proportions are missed by a gram or two.

Mix it up with the spoon


Put the cap back on. When it is active, I put the jar of starter toward the back on top of my fridge. It is a little warm with relatively still air there.


You can keep the starter in the fridge until 3 days before you want to use it. The general idea is to wake the starter up by taking it out of the fridge, rev it up for a few days with regular feeding, build its volume into a leaven, then make the bread dough. If you bake every week or even more often, it probably makes sense to keep the starter out all the time. But if you are like me and only bake every two weeks or less, refrigerating it in between cuts down on work.


Making the Leaven
When I expand the starter to a leaven, which does end up constituting a fair portion of the bread, I use the good stuff (my Wild Hive stash, kept in the freezer). I've been using 20% of the flour weight in leaven. My regular batch these days is 2800g flour, so I start with 280g whole rye and 280g water.

I mix the rye and water up in a medium sized bowl with a good spoonful of the active starter. The rest of the starter gets tossed and I wash the jar, since after a while the jar gets kind of crusty. The leaven bowl gets covered and put on top of the fridge overnight.

Of course you can use wheat flour for maintaining the starter and building the leaven. But I've read that it is easier and more forgiving to use rye. And ending up with a portion of my bread as rye is fine with me. As a minority ingredient it just adds dimension to the flavor.

When I make the dough, I put a spoonful of the leaven in a canning jar to become my next chunk of starter. Usually it goes straight in the fridge since I know I won't be baking for two weeks.


Making the Bread
I ordinarily bake a ~5kg batch of bread about every other week. This works out to the equivalent of 3.7 store bought loaves per week!

Mostly I make the bread with whole grain flour from Wild Hive. I have been using 10% rye (supplied by the leaven), 20% hard red whole wheat, and 70% soft white whole wheat. The large proportion of soft white whole wheat makes the structure of the bread pretty droopy, so I use about 72% hydration. If I am baking for company or I've run out of whole wheat, I use 10% rye and 90% unbleached AP flour from King Arthur. The white flour does well with hydration at 80%.

My kids don't like the bread to be too hard, so I put in about 2% olive oil. And I think the flavor of whole wheat is especially good with a touch of local honey, which I put in at 5% (by weight, as a portion of the flour mass).

To start out, the leaven is mixed with the water and the flour in a big tupperware and left to sit for 30 minutes to autolyse.

After 30 minutes, the oil, honey, and salt are added, stirred more and numerous folds with wet dough scraper and hands. The lid goes on and it sits for 20-30 minutes.


 In the pic below I've got another 1kg batch going on top, to test how it worked out using 90% whole hard red wheat.


About every 20-30 minutes, 3-5 times, I stretch and fold in thirds one or two times. By the end the dough is smooth, soft but coherent, and elastic. I let it sit undisturbed for another hour or two until it is at least doubled in size from its pre-rise bulk.


Next, I dump out the big tupperware on the counter.


and divide the dough.


I understand that it is better to minimize use of extra flour at this stage, but I don't have much success in that department.

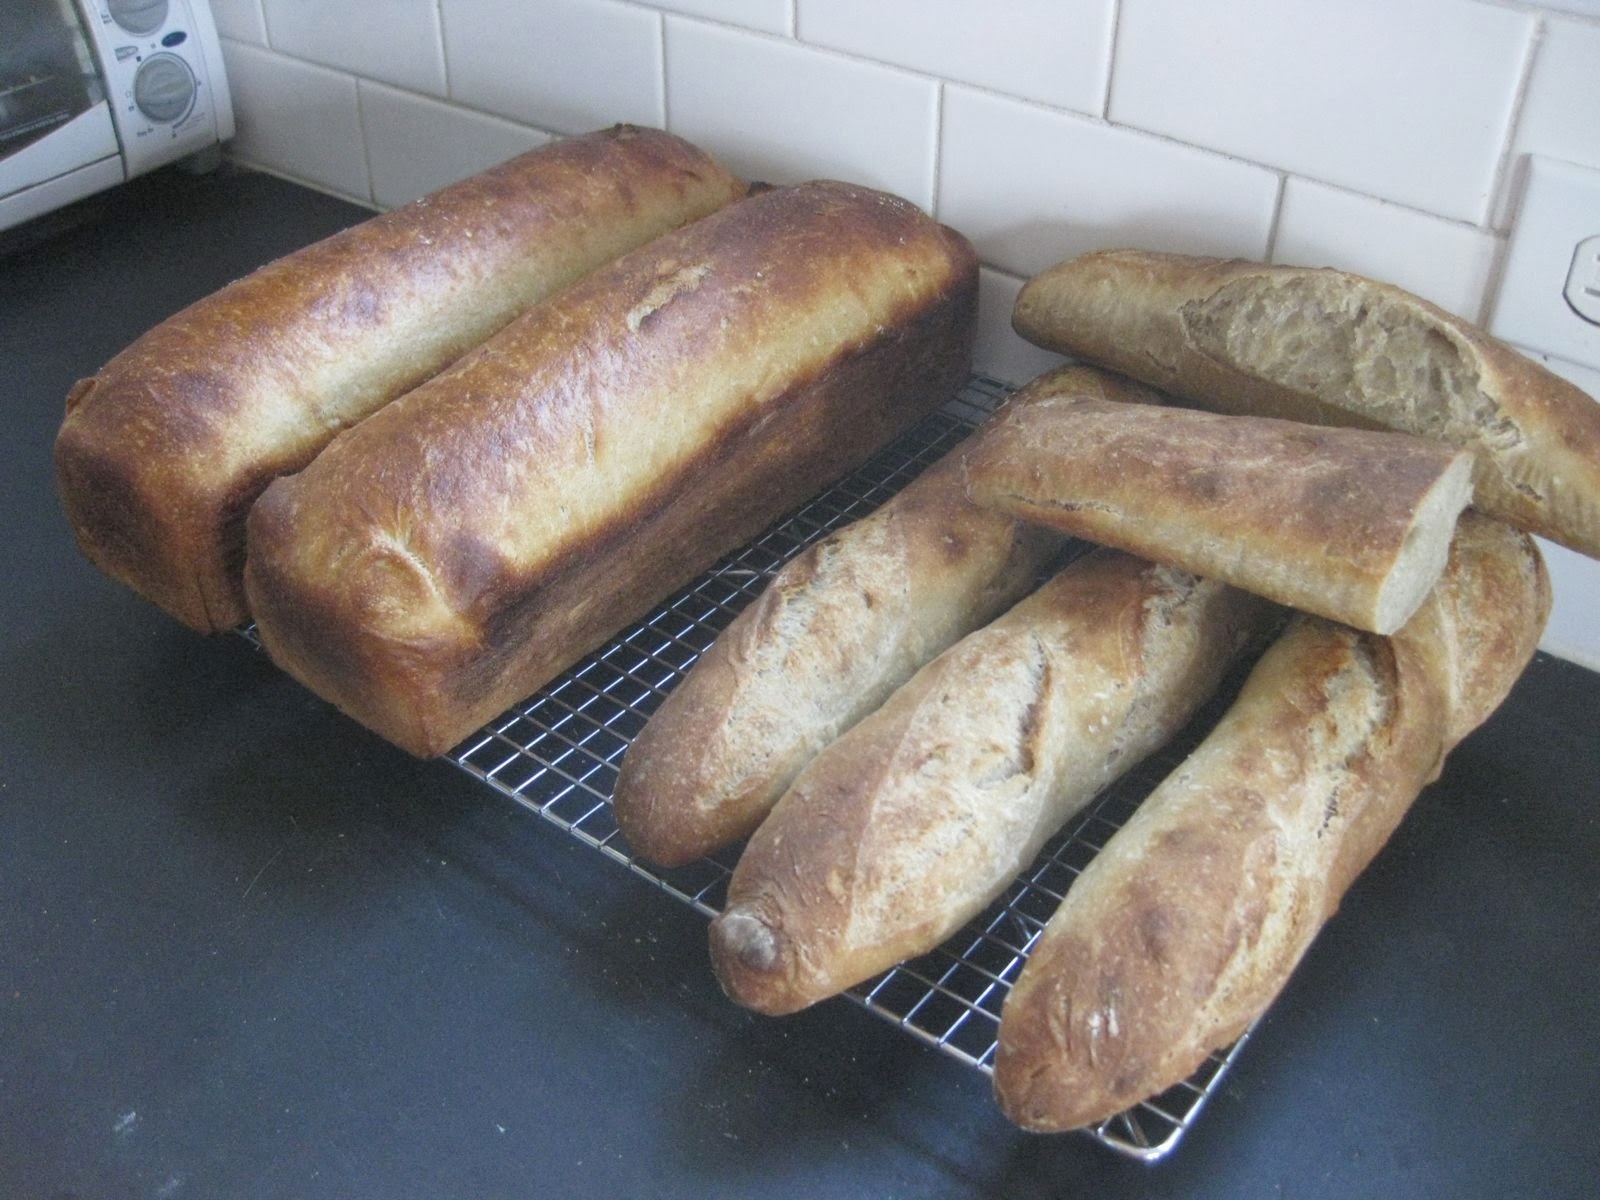
Child 1 prefers sliced bread, but Child 2 and Child 1 like "log bread" better. This works out well for me since I can do about half the batch in two long pullman pans, and the other half as six baguettes in triple baguette pans.


I form the loaves up, trying to get plenty of tension in the outer skin (but I still have a long way to go here). I proof them for 1-3 hours at room temp, then bake. Lately I have been baking at 250C (475F). If I bake the loaf pans with their lids on for the first 15 minutes, the high moisture environment in the pan leads to better bread. The pan loaves take about 30 minutes total. The baguettes take about 22 minutes, and I try in vain to steam the oven with water dumped into a preheated pan and some spraying the sides of the oven with a squirt bottle.


If needed, the dough can be put in the fridge overnight after the folding stage (bulk rise occurs in fridge), or after loaf shaping (proofing happens in the fridge). The sour flavors will be stronger the longer it stays in the fridge.


I let the bread cool completely on a rack. Usually we eat up a baguette or so for lunch or dinner. Then I cut it up.


It goes in bags and then to the freezer. Becky takes out a bag to defrost as needed through the two weeks between baking.


Pizza
For pizza, I put in a stone on a rack near the bottom of my oven and max its temp out at 288C (550F) and let it preheat for at least 45 minutes. The dough gets predivided into 250g chunks and left to proof for an hour or two. Pizza dough holds together much better when made with KAF AP white flour, but half white half whole is also pretty good. But I often save a chunk of dough from the main 100% whole grain batch to make into pizzas one night for dinner. The whole grain turns out fine too.


Each chunk is stretched and placed on a wood cutting board sprinkled with semolina flour (to prevent sticking). The pizza gets topped, then slid off onto the stone. After 3-5 minutes, it is ready to come out and be served. These pizzas were topped with different combinations of mozzarella, parmesan, tomato sauce, chives from the garden, violets and dandelions foraged from the yard, and pancetta.


I started making sauce rather than using jar sauce from the store. It is far better (for pizza), and only takes a minute to mix up since it doesn't require cooking. This is adapted from the basic sauce recipe in Peter Reinhardt's great book on pizza.

  • 1 box Pomi tomato chunks
  • 1 tsp salt
  • 1 tsp black pepper
  • 1 tsp oregano
  • ~5 cloves minced garlic
  • juice from half a lemon


I took some half whole grain dough balls to a pizza party thrown by Peter Kane in his back yard. He has a wood fired pizza oven, which provides the foundation for an awesome party! My hydration was too high, so the dough was too droopy and sticky. Hard to work with but still tasted good.


Pete's family cranked out a whole pile of pizzas, with assistance from Steve.


Here is Manabu, struggling gamely with one of my sticky doughs.


Pete's dough was based on the Neopoletana recipe from his pizza book, which was easier to work with and turned out great.


November 12, 2013

Cider 9: making 800 liters of cider in one day, by bicycle power


For the 9th year running, we made cider. Most of the last 9 years' cider get togethers have been organized by Ben Polito and his family, and have been hosted at their holdings in Five Islands, Maine. This year the weather was perfect, everything went smoothly, and people generally enjoyed themselves.


Ben's writeup on year 9 can be found at his blog.

Friday
We arrived on Friday late afternoon and had time to unpack a little, settle into our rustic accomodations, and enjoy a nice dinner by the water with Ben's family and much of the Maine based cider crew.

The xB was happy to be de-freighted at the barn.


This was year two in the big barn Ben's family built on his grandparents' land, which is very convenient for running the cider production and associated meals. As can be seen in the picture, it is still getting finished, but its coming along nicely.


Most of the year, our custom designed and built cider machines sit idle in the barn, waiting patiently to be hauled into position and given their chance to rapidly process vast quantities of apples with extreme efficiency. Improvements this year were the addition of a bulk mixing tank, and an improved apple washing system.


Saturday
Ben had bought some supplies to cobble up an improved wash station, since washing apples has been one of the more arduous and time consuming tasks in years gone by. B.Wilkins and I built a wooden frame which divided a galvanized washtub full of water into two halves. Four brushes were screwed down to this, forming two V shaped brush channels spanning the wooden frame and linking one side of the tub to the other. In practice, this is how it goes:

First, some apples are loaded into buckets, in this case by Millie and Ilana.


Next, apples get poured into one side of the tub, and another brush is used to scooch them across a V channel into the clean side. Violet is demonstrating here using a toilet brush (which Ben swears is new :).


From the output side of the wash tub. they are taken out, relieved of any heinously bad spots, and put into a bucket for the shredder crew. Child 1 enjoyed moving apples from the wash bucket to the shredder input bucket.


This new system was faster and more pleasant than swooshing around apples by hand in a bucket of water, and did a much more thorough job of washing too.

The shredder has been kicking it out the last couple years with remarkably few issues.


By far the highest number of joules required by this operation go into the shredding. Even with two bikes yoked to it, one still gets some brisk exercise while pedaling one of the cycles. Note the highly functional sideways sway stabilizer in the back crate below.


The core fodder for the hard cider mix included about 300kg Ben picked at Poverty Lane in New Hampshire. This included Yarlington Mill, Wickson, Kingston Black, Bramtot, Stoke Red, Michelin, and some russets. We also ran a bunch of buckets of wild apples picked by Ben's parents Dave and Emily from around Georgetown island. Among them were some buckets of an interesting apple which looked just like a golden russet, but was more crisp and a lot less sweet.

The press itself operated quite smoothly. Much of this is down to operator skill level increasing in regards to how to load and fold the fabric pack tiers of shredded apple, called cheeses.


Ben set up a hand operated bilge pump to move the output of the press up into a 400 liter conical US Plastics tank, perched in its steel cradle on top of an elevated stand Dave put together. This arrangement eliminated the time consuming and finicky task of pouring cider from pots into many small bottles, and also allowed better blending between press loads (which are often composed of only one or two varieties of fruit). We filled up the bulk tank with cider from a mix of apples destined for fresh consumption, then dispensed from the bottom of the tank through a hose into the prepared plastic bottles.


The filler fruit for the hard cider run and most of what went into the sweet mix came from Autumn Hills in Groton, MA. Andy, a long time cider attendee, works as a farmer and has a relationship with the orchard for supplying fruit for his CSAs. So he was able to hook us up with about 500kg of mixed packing rejects. Ben graciously drove down from Maine to load and transport these apples, and gathered 100kg or so of Rhode Island Greening drops to boot. I brought about 60kg of Greenings and what I think is Yellow Delicious, which we picked some weeks earlier (brought to Maine by Aaron Schmidt, as our car was FULL). Other folks also brought in apples in varying quantities, including some nice wild apples supplied by Becky's friends Stephanie and Antonio from their place in ME.

After the bulk tank was full with the hard cider mix, compressed air was fed into the bottom port to assist in mixing. Then the waiting line of glass and plastic carboys was filled, with just a tiny bit left over.

The weather was lovely enough to kick back on the grass outside the barn. Here is Becky and Violet crocheting, Millie and Child 1 taking a break from running amok.


In parallel with making this year's cider, several carboys of last year's hard cider were carbonated and bottled. We set up a trash can full of ice water, which could accommodate three corny kegs loaded with cider and under pressure from a 9kg CO2 tank. With agitation, these chilled down and carbonated fairly quickly and were used in sequence to feed Ben's double barreled counterpressure bottling rig.


Food
Saturday breakfast was mainly provided by the Wilkins with a smattering of dishes brought by others. Ben's parents provided the bulk of lunch with a 40L stainless cream can full of potatoes, sweet potatoes, cabbage, carrots, sausage, and corn which had been simmering with beer all morning over a propane turkey cooker. Apparently this is a well known thing in Nebraska, and a quite handy way to generate large quantities of food with modest amounts of work.

An excellent technique which we employed several times this year, starting with the cream can meal, was the dumping of huge loads of hot food straight into a clean cooler. The food could be served conveniently right out of the cooler, which keeps it warm and has a lid to keep wasps out and moisture in.

Soup and Sausages
Becky and I started working on dinner food at around 3pm. Ben brought a pile of butternut squash from Stroudwater; Becky used 5 of those I think. Andy the farmer also brought some other veggies to put in the soup. While I was busy with pie and bread, Becky cooked up a delicious squash soup in our large pot over a turkey cooker, which was dumped into a cooler when it was done. We brought a bunch of sausages for dinner too. These got cooked in Ben's giant new Cabelas cast iron skillet (~400mm diameter!) on a turkey burner.

Pies
A few weeks before cider, I turned about a bushel (18kg) of apples we picked into 8 prepared pie fillings, packed individually and preserved in the deep freeze. There is some advantage to doing more fillings at once, since you save on the overhead of set up and clean up. Each filling was composed of

  • 1100g of peeled, cored, apples (Rhode Island Greenings, Yellow Delicious, and Empire this time)
  • 1/4c white sugar
  • 1/8c boiled cider
  • pinch salt
  • 1 tsp cinnamon
  • juice from 1/4 lemon
  • 1/8c corn starch
I first peeled and cored, using my trusty antique Reading peeler, weighing as I went and dividing among two large vessels.


Then everything but the corn starch was put in, mixed, and allowed to macerate for 45 minutes.


The drained liquid was boiled down in a saucepan while I divided the apples among 8 ziploc bags. Once the liquid was reduced and thickened, it was divided equally among the bags, then the cornstarch was added to each and they went into the deep freeze. Four of these fillings came to cider, serving as the ice packs in the insulated grocery bags we used to bring all the groceries for dinner prep.

Bread
A week before cider, I cultured and churned 2L of cream into butter and buttermilk, much like in this older post. This butter got salted and molded for taking to cider to eat on fresh bread. Some of the buttermilk went into the pie crusts, the rest went for pancakes, waffles, and cold cucumber soup. 

In preparation for cider weekend, I had been working on scaling up baguette-like bread baking. I worked out both a whole grain and a white recipe based on a full 2270g (5lb) bag of flour. For cider, I ended up making 24 loaves of bread in two batches in Ben's grandparents' oven. It was late as usual, dang it. Here are the ingredients for the white batch.

Starter
  • 1700g King Arthur unbleached all purpose flour
  • 1700g water
  • 1/8 tsp instant yeast
Supplement
  • 570g flour (rest of bag)
  • 1 tsp instant yeast
  • 40g kosher salt

For the whole grain batch, I did:
Starter
  • 1400g AP whole grain soft white winter wheat flour from Wild Hive
  • 1400g water
  • 1/8 tsp instant yeast
Supplement
  • 100g whole grain rye flour
  • 100g vital wheat gluten
  • 670g AP SW winter wheat flour
  • 1/2c olive oil
  • 1/2c local honey

The below pics are from test batches, since I was way too harried at cider to document the process there.

Process
Mix up the starter, let it go overnight. 


The next morning, add the other ingredients and do about 20-40 folds with a scraper in an oversize container holding the dough.


Every 20-30 minutes, do a couple stretch and folds, total of 3 cycles beyond the initial mixing. Let ferment all day. At cider, I put out the two tupperwares in the sun mid-day since I thought they needed a boost.

Turn dough out on well floured counter, do one last stretch and fold, divide into 12 chunks using scraper.


 Let rest for about 45 minutes. Shape into loaves, deposit on parchment lined baguette pans. 


I bought a couple more pans before cider weekend, so I could have a total of four 3 loaf pans. This totally fills the racks in a home oven, which makes baking heat pretty uneven. But if you rotate and flip the loaves during the latter half of baking, its ok if not ideal. 

Let proof for 45 minutes, slash, bake for about 20-25 minutes at 240C (460F) in a well preheated oven, preferably with a stone on the bottom. Cool for at least 10 minutes. 


Enjoy with big slabs of delicious butter! 

This bread turned out pretty well, besides being ready later than intended. It does bake much more evenly with only one pan per oven rack, but doubling the throughput is useful sometimes even with its drawbacks. The whole grain has an excellent sweet, nutty flavor, but doesn't rise as well as the white.

Dinner was held in the big barn, rather than at someone's house. This had many advantages, but did complicate certain aspects of the food preparation. I was rushing back and forth between two houses to do the pies in one oven and the bread in another.

There was actually a ton of food at dinner, both leftovers from lunch and breakfast as well as food brought by attendees. There were 46 people present for dinner, down from the peak activity period in the afternoon. Plenty of food was leftover from dinner; much of it eaten on Sunday for breakfast and lunch.

Josh K. and Kelsey cooked up some fine blueberry pancakes for breakfast on Sunday, once again putting Ben's giant iron skillet to good use. There was even some apple pie left from the previous night.


Sunday
Ben did much of the remaining cleanup and stowed the cider equipment on Sunday.


Child 1 helped wash some press grates.


We had to leave pretty early on Sunday to get back to town for Chinese School at 2pm in Lexington. I started taking the girls to this in September, and we had already missed two weeks for a trip out west. So I thought it would be good if we made it back for that, despite the fact that we all wanted to enjoy a few more hours of a beautiful fall day in Five Islands. Here we are saying goodbye to Ben. Becky is explaining our dreams about landscaping our back yard in Somerville; Ben is looking at her like she is a total nutball.


The xB was packed up pretty full for both legs of the trip.


We brought back a heavy load of cider. I was planning on freezing about half a carboy of cider for drinking sweet later, but our deep freeze is chock full of chickens at the moment due to some interesting planning regarding our meat CSA. As a result, I froze all the small bottles of cider we brought back, but ended up starting a 6th carboy fermenting to hard cider.


Hard Cider Progress


In this picture, I have a halogen work light plugged in underneath the carboys. The front left two were having trouble getting started, so I left the light under there for a couple hours while I attended to other business in the basement. This did the trick nicely and both had developed a rich head of foam by the next day.

Several weeks having passed at this point, I just racked this cider into secondary last weekend. One of the airlocks had somehow come off a carboy, but I racked it anyway and will hope for the best. Worst case maybe I can turn it into a few years worth of cider vinegar.

During racking I tasted the young cider. Of course it is very yeasty at this point, and sweeter and tarter than it will ultimately become, but to my palate it is shaping up quite nicely.