July 12, 2013

Black bean dyed A line dresses


I put together two more copies of the super simple A line dress patterns for the girls, and we dyed them using black beans.

The fabric, construction, and seam finishing is the same as in the previous post on the A line dresses, but I did drop the hem about 10cm and bring in the side seams a little on Violet's dress. To tell you the truth I'm not completely loving how this A line pattern looks; it is very sack-like. But it is extremely fast and easy to do, which is a plus. On these I used white #30 Tire silk thread throughout, rather than the junk thread I used on the muslins.

Lately I've been thinking about dyeing of fabric. Here is the vision that I find enticing: Stock undyed bolts of a select few types of fabric, in wovens perhaps a wool, a cotton or cotton/linen, and a silk, and one roll of jersey knit in cotton. Dye fabric off these bolts as needed to make clothes. Doesn't that sound simple, but profoundly powerful and adaptable? Sure, it is nice to luxuriate in the bounty that is the modern textile industry, with zillions of combinations of fiber blends, weaves, and colors. But I think that contributes to the fabric stash build up problem; you see something interesting and buy it to have in your stash, only to neglect it later since its not exactly what you want for the project you are working on. It is also tiring to have to shop for the right combination of features in a fabric. It could be more straightforward to lay in a stock of high quality fabric you are happy with, then set the color later as part of the sewing project itself. I think I could be quite happy with a basic palette of colors on good fabric.


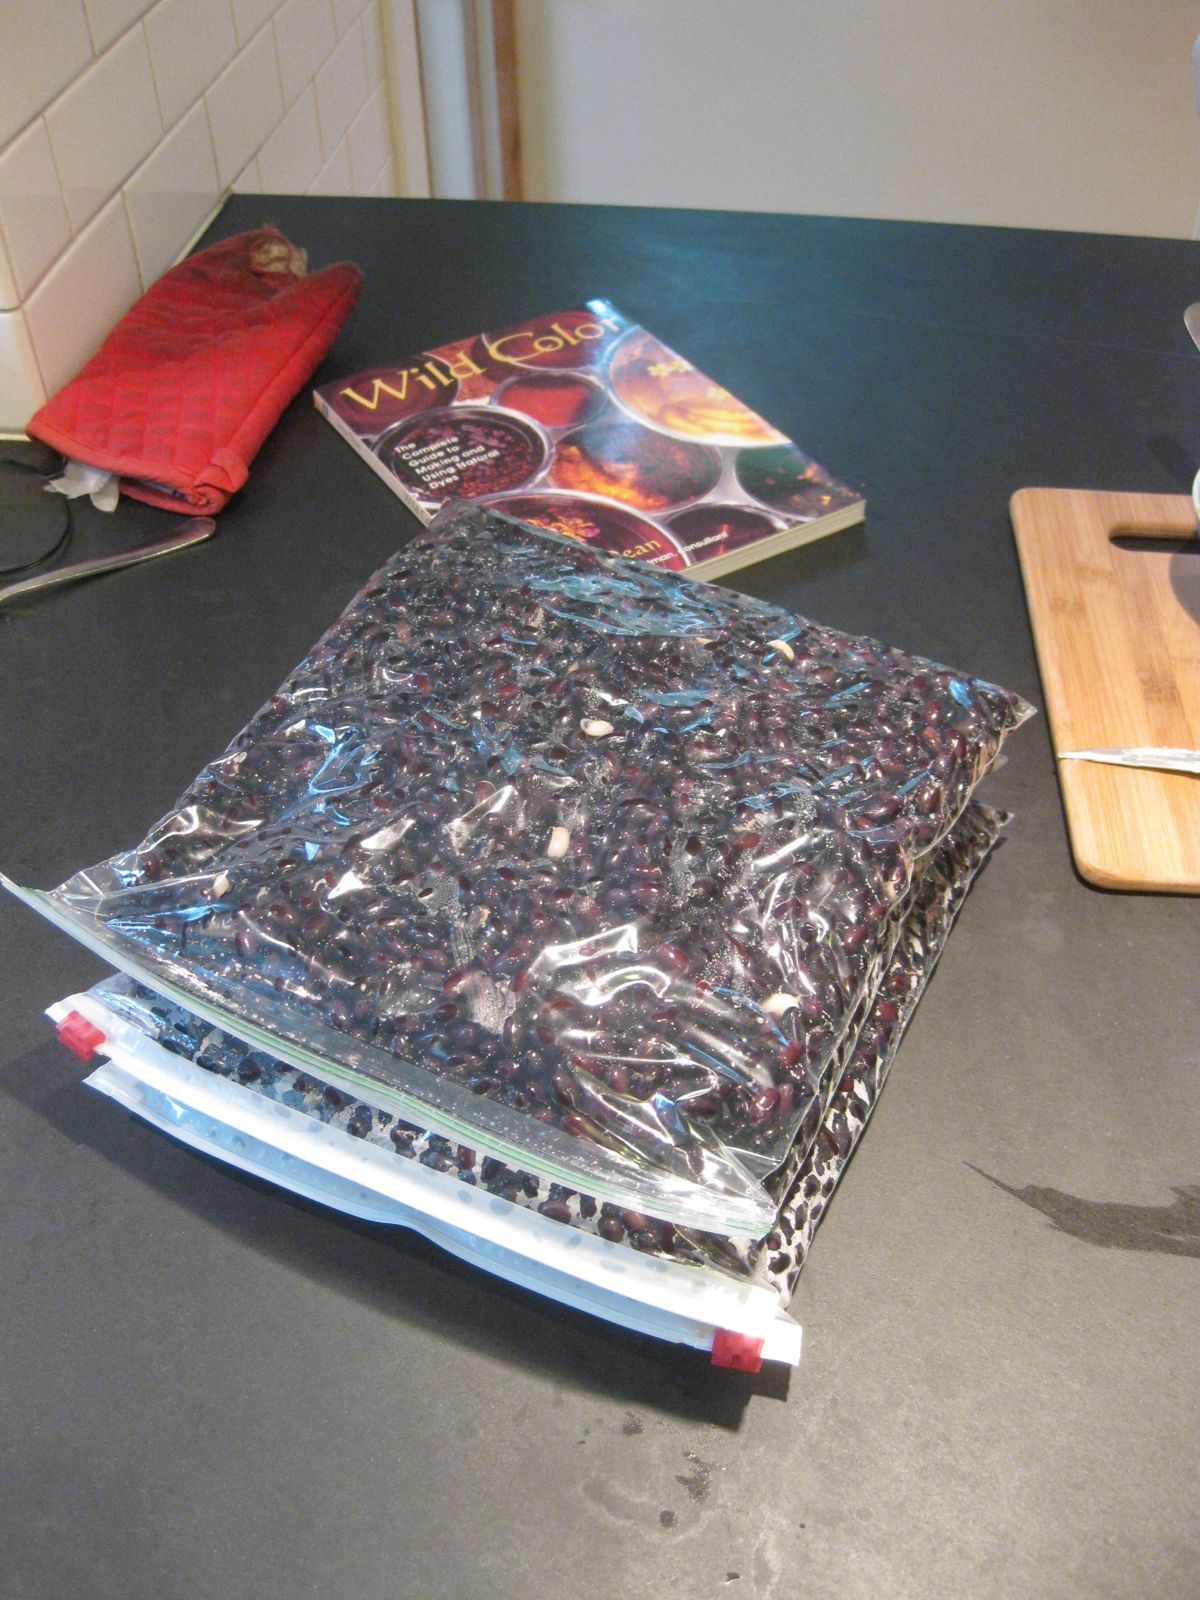
With dying on my mind, I dug out a book on natural fabric dyeing that Becky bought like 10 years ago, called Wild Color, by Jenny Dean. At the time I made a lot of fun of her for buying this book, teasing her that most of the colors you can get from natural materials look like shades of barf. Now that I am poring over this book nightly, she is relishing how the tables have turned! Natural dying seems more interesting than synthetic since it is easier for the kids to see where the dyestuff comes from and allows us to get more deeply involved in the process, especially if we can grow, forage, or otherwise source the raw materials and extract the dye ourselves.

To experiment with having a dyer's garden, we planted a few dye plants. The Japanese Indigo seeds appear to have been unviable or maybe I just not a great gardener, in any case they didn't come up. I'm pretty sure this is the woad I planted though:


Woad makes the same molecule as indigo, but at a lower concentration.

Indigo

I put in a small patch of Madder, which is doing well so far. In 5 years or so, I should be ready to dig up the roots and use them to make an excellent red dye bath.


I read online about dyeing with black bean water. The color it makes is a grayish-blue, one of my personal favorite color ranges. The raw inputs are cheap and easy to get, and you can eat them afterwards. I did come across some sources that said it was not particularly fast as a color, but I figured I could always redye the dresses later if the color didn't last.

The first step was to mordant the dresses. I read in Wild Color that vegetable fibers are harder to dye than animal fibers, but this could be partly made up by doing some extra work in the mordanting phase.

The book recommended a tannin treatment before the alum mordanting I was already planning on. One of the sources of tannin listed in the book is Staghorn Sumac, apparently very widespread and super high in tannin. I looked up how to identify this plant online, then kept an eye out for it. It's amazing how once you are attuned to look for something, you start seeing it everywhere, even though before you never noticed it. Well, I can report that there is a ton of Staghorn Sumac growing along the bike path I commute to work on.

Sumac is generally shrub sized, grows in clumps, has a large compound pinnate leaf, and upward facing cones of tiny flowers in the summer.


The Staghorn variety can be identified by the fuzz on the stem of new growth.


And by the jagged edges all the way around the leaves.


One evening, Becky and the kids met me in Lexington Center for dinner. Afterwards, we walked along the bike path a little and harvested a pile of staghorn sumac leaves. There was some construction going on nearby, and Child 1 was excited to see the earth moving equipment.


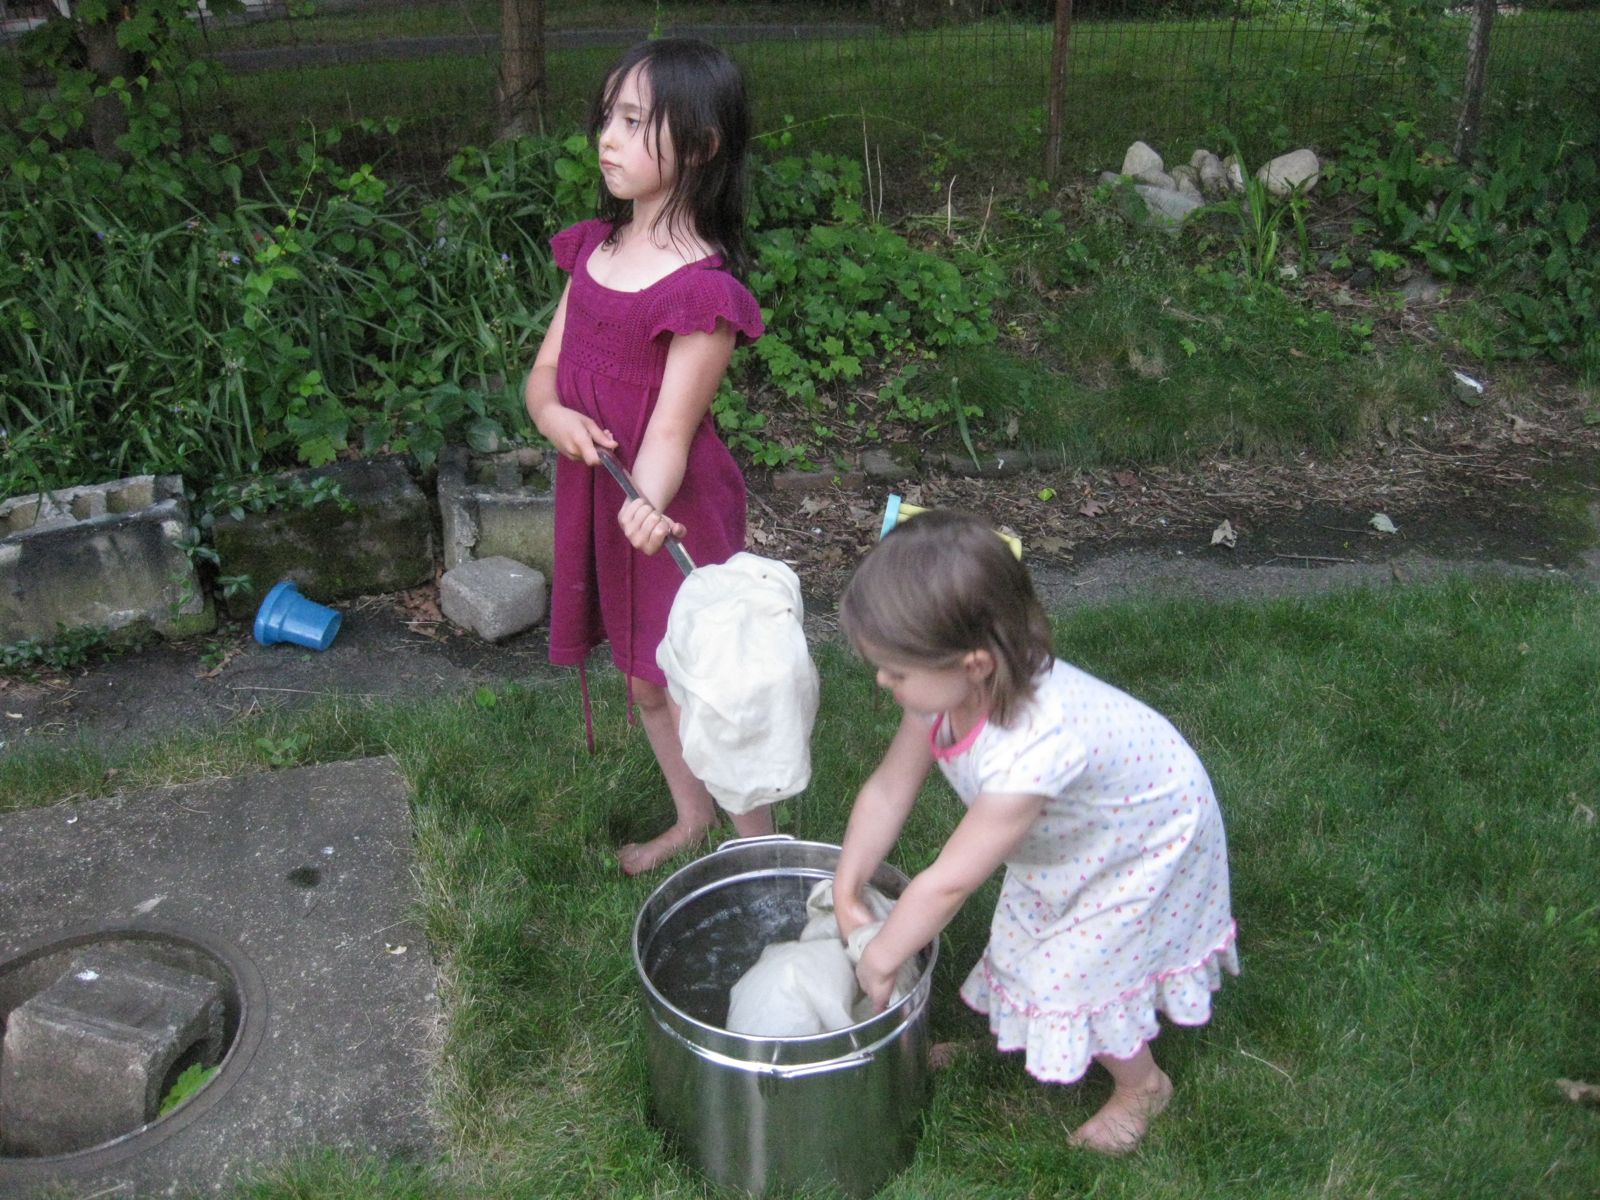
The girls took turns rolling down a grassy hill nearby.


The next day, Millie cut all the leaves in half and loaded them into the strainer of a stainless pot I got just for use in dyeing. My friend Helen was visiting, so she, Child 1, and Violet helped.


The pot was pretty full with sumac leaves when we filled it with water. It was boiled on the stove for about an hour, then left to cool down through the afternoon.


Meanwhile, we put 2.2kg of Goya black beans into a pot.


 and covered with about 15L of water.


When the boiled sumac broth was cool, we strained out the boiled leaves.


Then added the dresses


 and a few other test pieces, about 300g of fabric altogether.


 This was left to sit until the next day, then removed. The fabric was squeezed out and run through a cold rinse cycle in the washing machine. It had picked up a greenish-gray cast, you might say a light-ish barf color.

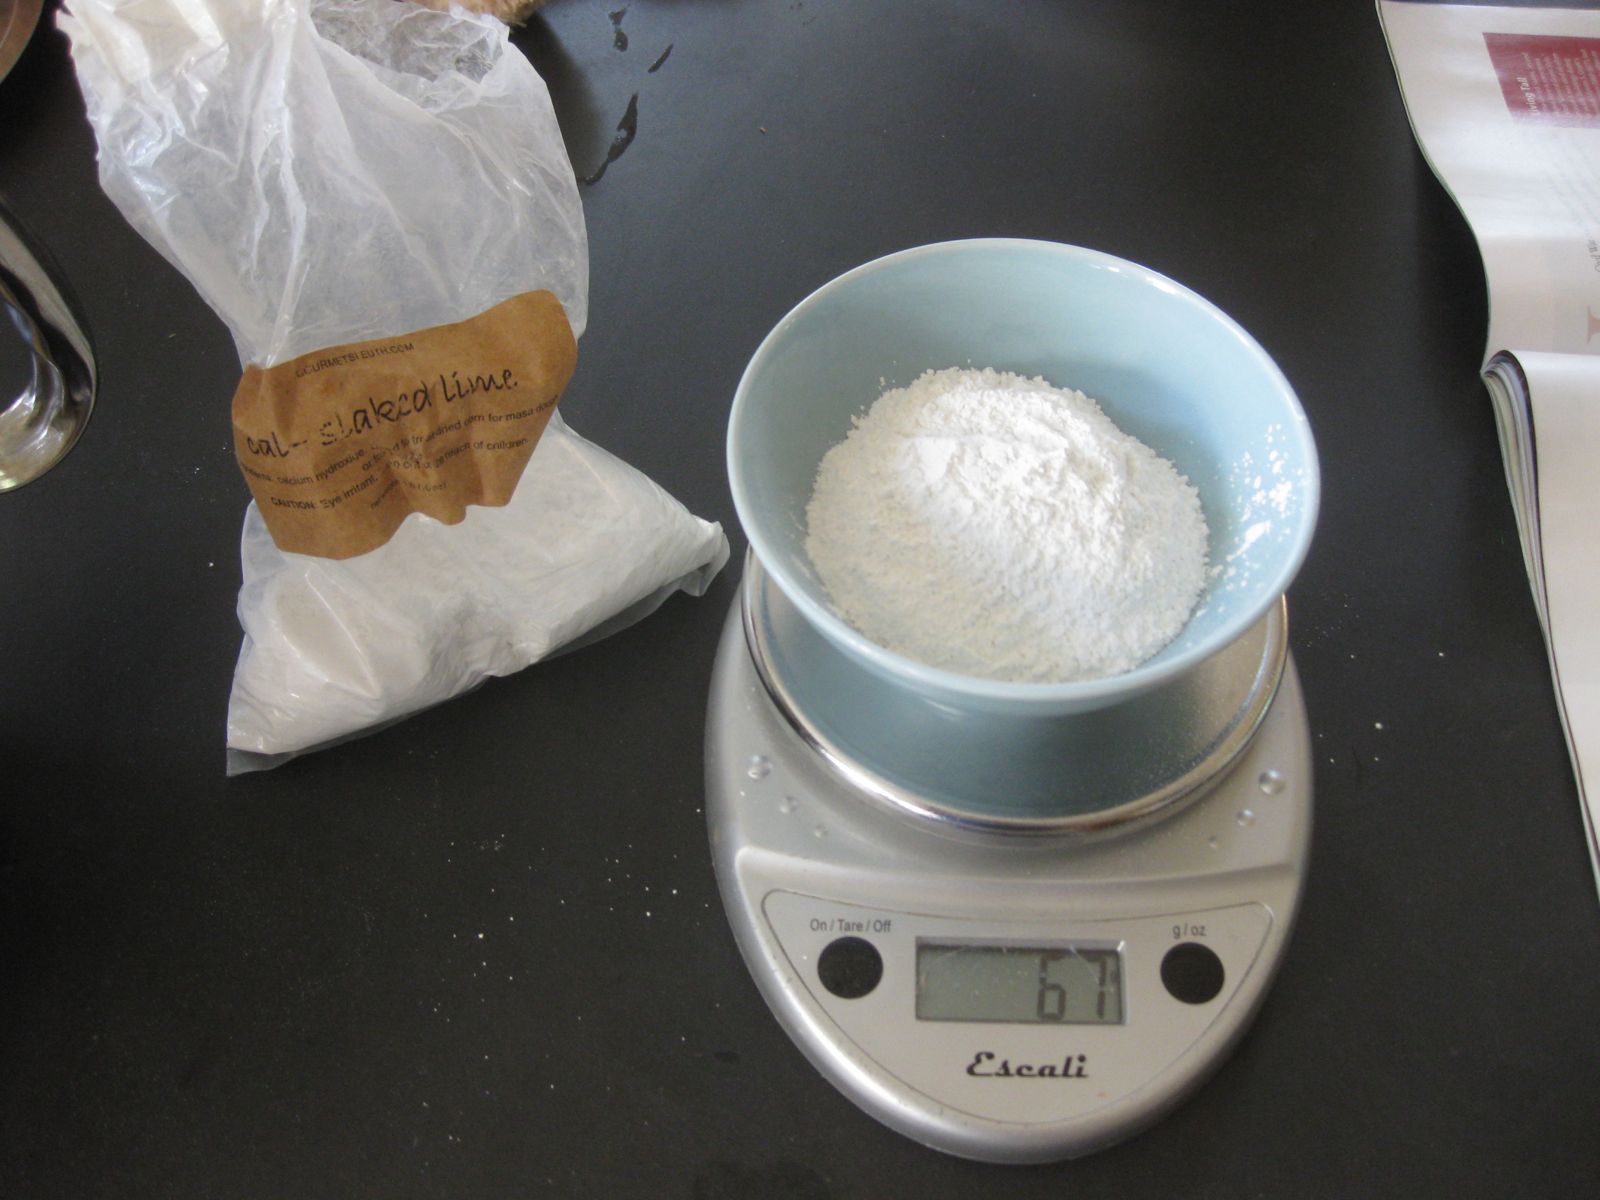
Next, we put a 1/4 cup of alum and 1/8 cup of washing soda into about 10 liters of boiling water. It didn't fully dissolve, but we filled the rest of the pot with cool water and added the rinsed fabric. This was brought to a simmer, then allowed to sit overnight.

We also siphoned off the black bean water into a bucket.


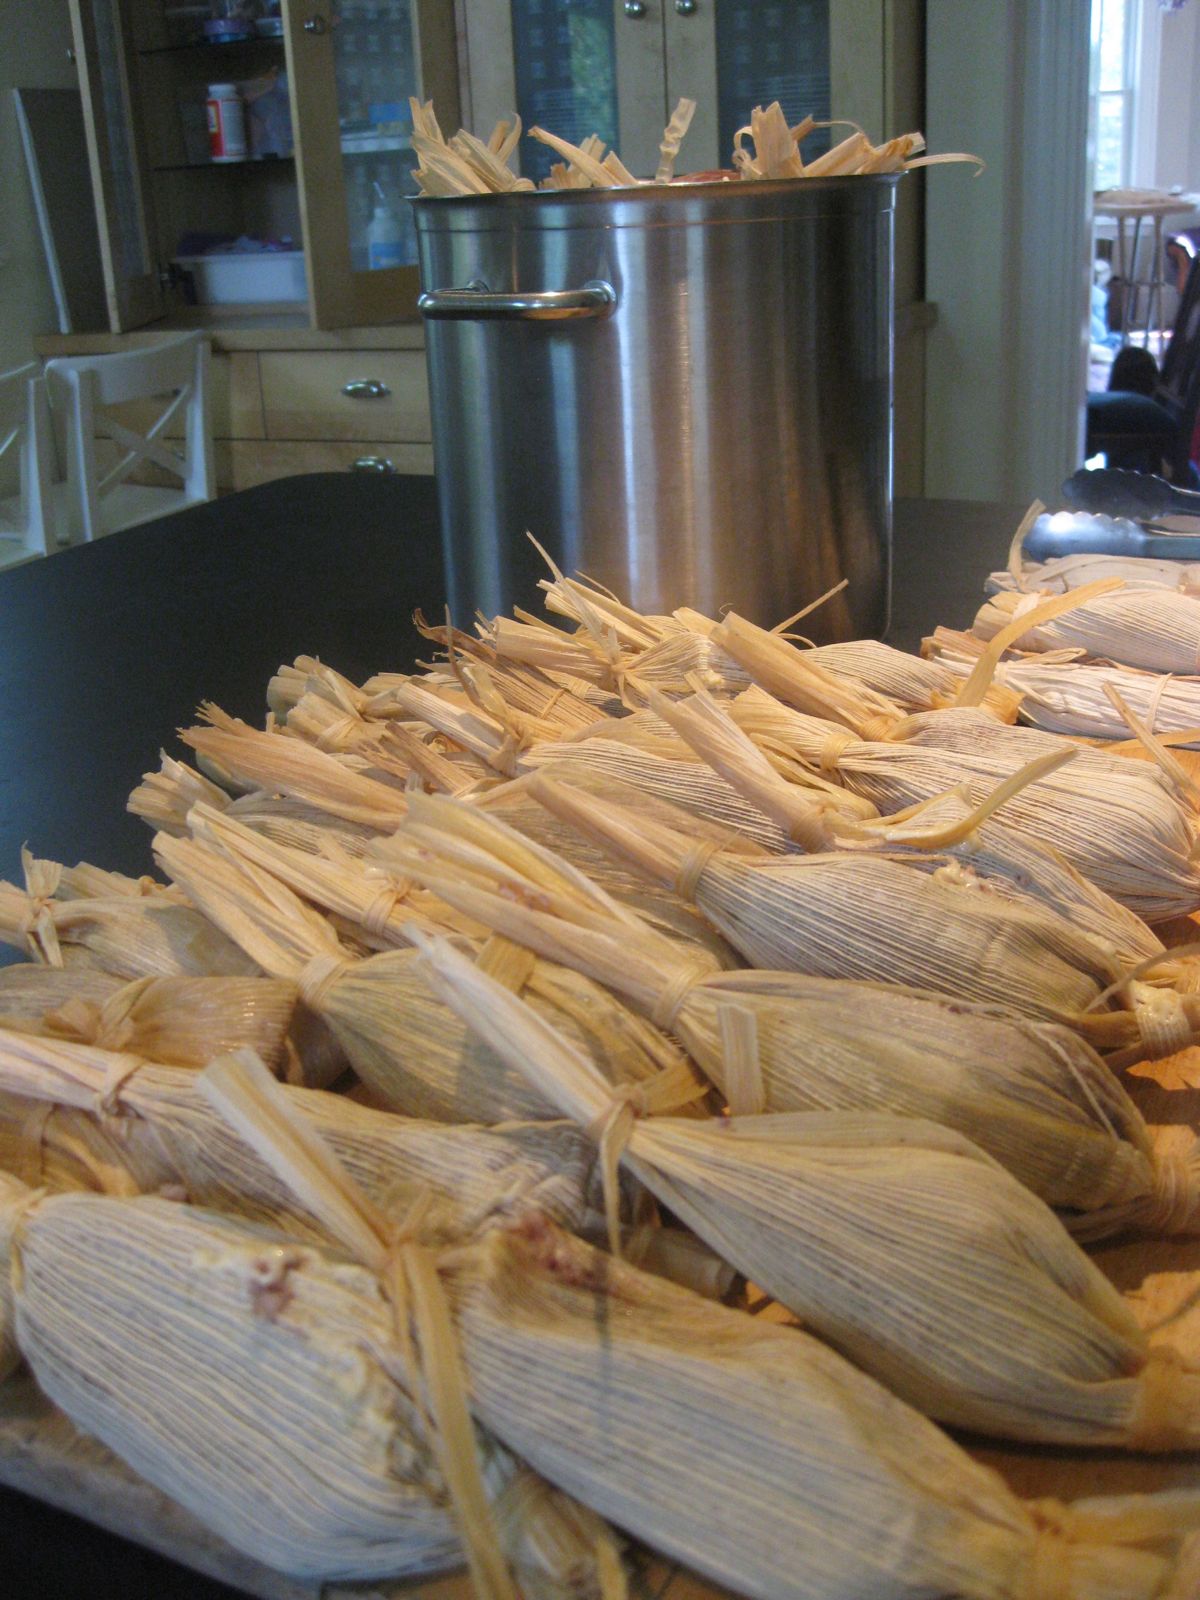
Apparently it is detrimental to get the slime and proteins down close to the beans, so we just only siphoned the liquid until it was down to about 10mm above the beans. Then the beans were strained, packed in bags, and frozen. We ended up using about half of these beans in tamales.


The next day, the fabric was removed from the alum bath and run through another cold water rinse in the washer. Then finally the goods went into the dye


 then sat there for the next two days, with the occasional stir.


On removal, we once more rinsed them in the washing machine. What a lovely color they came out! This is what they looked like wet.


The piece on the left is silk charmeuse, the ribbon is bias cut silk habotai, and the coupons near the bottom right are wool. The wool didn't really take the color at all, the cotton/linen worked nicely, and the silk took the deepest color. Millie had recently been digging around the ribbon box and asked if I would make her something with this polka dot ribbon, so it is layed out here so I could get a first impression of how it would look on the dresses.

I hung them up to dry. Later on, I made some flowers by folding a strip of silk charmeuse in half, then gradually rolling it up while stitching together the bottom edge and putting in some foldbacks and gathers.


The polka dot ribbon and buttons were put on


and the dresses were ready to wear.


We went to a little fun fair then watched fireworks in Lexington on July 3rd, and the girls wore their dresses for the first time.


The dresses got washed (I think in cold water) with our regular laundry soap, and came out very faded. I think maybe the enzymes in the soap attacked the dye. Now they are trending toward that subtle vomit color I mentioned above, kind of a light tan-gray-green. Too bad, the color was really nice! Ah well, we had fun doing this project and maybe at some point I can take the trim off and lightly overdye them with indigo.

July 6, 2013

Tamales - from corn kernels, pig fat, & cream


I grew up in California and love mexican food. When I moved to the Boston area, I found the offerings in this cuisine sorely lacking (these days I think Anna's and Boca Grande are pretty tasty). One less common dish I especially favor is tamales.


A tamale is a sort of dumpling made from corn dough surrounding filling and sauce, traditionally wrapped and steamed in a corn husk or banana leaf. The corn dough (called masa) is made from ground nixtamalized corn, whipped with fat, stock, and salt. The fillings and sauce can be anything, but  red pork, chicken, and beans are common in restaurants that I have patronized. The specifics of the masa, fillings, and packaging vary by region across latin america.

Even at establishments that offer a tamale however, it is often not very good. I think the one at Boca Grande is decent, if you are in the area and want to try one out.

I had been itching to try making tamales myself for years when I ran across this book in Page, AZ:
Tamales 101: A Beginner's Guide to Making Traditional Tamales, by Alice Guadalupe Tapp.
I bought the book and pored over all the amazing looking recipes in it, and prepared to try them myself when I got home.

After returning to Boston, I scoured the latin markets of Cambridge and Somerville trying to find fresh, unprepared masa (just the moist ground corn, without the other ingredients). My search was completely unsuccessful in turning up fresh masa of any kind. The grocery store carries Maseca, the ubiquitous brand of dried nixtamal meal. I did try making some tamales with Maseca, but I found them unsatisfactory.

Not willing to let lack of local supplies get in my way, I took one step further up the chain and brought in materials to nixtamalize and grind the corn myself. I started with supplies from Gourmetsleuth.com; their yellow dent corn, calcium hydroxide, and corn husks. For grinding the treated corn, I purchased a C.S. Bell #2 hand grist mill, but it quickly became obvious that this grinder was not suitable for moist grains. It got hopelessly clogged up with the first handful of treated corn. Fortunately I found that the food grinder attachment on the kitchenaid did a reasonable job. It does produce a fairly course output, but in my opinion this is not a drawback for tamale making. Putting the meal through twice helps. The tamales made from this masa were fantastic!

Tamales are great to make in a huge batch, then freeze for later. You can take them out of the freezer, steam them for 20 minutes or so, then enjoy. Just prior to the birth of each of my kids, I made a big load of tamales to deploy selectively when we didn't want to cook during the difficult newborn months.

It had been a while since we had made tamales, so it seemed a good time to make some up. Here is what we did.

Nixtamalize
For the last few years I've been working out of a 20kg sack of blue corn I purchased on ebay, supposedly from indians in arizona.


This corn nixtamalizes beautifully and has a pronounced nutty and distinctive blue corn flavor. I must admit it has taken me longer than anticipated to work through the bag! We discovered recently that when ground dry in the C.S. Bell grist mill, it makes quite serviceable corn meal for things like cornbread, so maybe we'll be going through it faster moving forward.

I began with 3kg of corn pulled from the food stores in the basement.


This was rinsed in cold water:


Then went into a large pot:


 with enough water to cover the grains plus about 100mm extra depth.


Remove any floaters with a slotted spoon.


We began heating this on the stove and meanwhile stirred in 1/2 cup of calcium hydroxide until it was well blended.


As you can imagine, this much mass took a little while to boil, but once it did I simmered it for 15 minutes, then turned off the heat and let it sit for about 2 hrs. The corn (and water) will turn yellow and start to look sludgy.


The next step is to scrub off the chemically swollen outer shell on the corn. My method is to run cold water into the treatment pot until it is cool enough to handle. Then I take a double handful of corn from the pot and transfer it into a working bowl of clean water.


 In this bowl, I scrub the corn between my hands numerous times until is starts to feel smoother and harder. Then I dump the wash water and transfer the corn to another reservoir, and repeat.


When the pot is empty, I work back through a second set of washing and into the rinsed pot. Continue washing until there is not much scum coming off the corn anymore.


Grind
Earlier this year, my Kitchen Aid broke its attachment gearbox while grinding sprouted einkorn, and since then I have been making use of antique cast iron hand grinders. For this project, I used my Enterprise #5, with all the corn run through twice.


I think this was the first real instance when I was feeling that the #10 Enterprise may have been a better choice, but the #5 did the job.


 I think it took around 2 hours to run the entire operation, including clean up. Man, was I sore all week! And I got some blisters on my hands. But when we were done, we had over 4kg of ground corn. Here is Child 1, starting to clean out the grinder after we were done.


I reserved some to try to make tortillas, and froze a smallish bag with the excess, leaving an even 4kg for tamales.


Other ingredients for Masa
For this batch we used home churned cultured butter which we had made a load of the previous weekend, primarily for making pie crusts.

We started by culturing 2.8L of non-UP cream from grass fed cows, then churned in two batches through the 4L Dazey hand churn.


This made about 1100g of butter and 1.1L of buttermilk.


A little buttermilk went into the pie crusts with the butter, more went into waffles and pancakes, and the rest into cold cucumber soup. Here is Millie paddling the butter to squeeze out the wash water.


Becky has been cooking down chicken carcasses like mad, so we were able to use flavorful, thick, home made chicken stock for the liquid.

And finally, we used up some of the leaf lard we rendered a few months ago.


Mixing the Masa
Violet and I mixed the masa in two batches in the Kitchen Aid with the paddle attachment. The total ingredients were:
  • 4kg ground nixtamalized corn
  • 150g leaf lard
  • 650g cultured butter
  • 900ml chicken stock
  • 3.5TBS kosher salt

First we measured out the ingredients.


Then we whipped the fats until fluffy (about 2 minutes).


Then we added, in several additions, the corn and stock, then finally the salt.


Next, we whipped on high speed for about 4 minutes, until a chunk of the masa would float in cold water.


I ended up adding about an extra 300ml of liquid to get the consistency to what I think it should be, like drywall mud.


Extra Masa
I tried making some tortillas with the extra unprepared masa. First I added enough water to bring the consistency to that of play dough.


Then I put about 2 TBS between layers of polyethylene in the tortilla press. You can see Millie is skeptical.


The dough did not have much cohesion, probably due to the coarse grind.


This made it hard to release from the PE sheets without ripping it apart.


I did manage to get a few to come off in one piece using a dough scraper, so I cooked them in the iron pan.


We ate them for lunch with just butter on top. They tasted pretty good, but they did not much resemble corn tortillas from the market. They tasted like blue corn tortilla chips, except chewy and thicker. The girls were not impressed. So maybe we need a finer grind for tortillas?


Fillings
Last summer I bought some peppers at the farmers' market to make tamales with, but I didn't end up using them so I froze them. They came out of the cold for this project. I roasted them, first on a cookie pan under the broiler, then on the stove top to further carbonize the skin of some stragglers.


The blacker the better for removing skin. For some reason the green ones just would not peel.


Wrong kind of peppers I guess? After roasting and skinning, I removed the seeds, pith, and stem to ready them for tamale use. My hands were killing me for like 24 hrs afterwards. Should have worn gloves, but its hard to pinch the skin with gloves on.


We also have 2.2kg of presoaked black beans in the freezer, from a cloth dying experiment I'll detail in a post in the next week or two. Becky took out about 1500g of these and cooked them up into the usual black beans we use around here for tacos, rice companion, etc.


Assembly
In the past, I've used corn husks from Gourmet Sleuth, which were pretty good. This time though I tried some from Hoosier Hill (via Amazon) and these were even better.


Bigger percentage of large contiguous husks, which makes tamale making easier. The husks get steamed for about 20 minutes to soften them while other things are readied.


One tries to fill on the smoother side of the corn husk, since it releases the masa better later, but sometimes it is hard to tell.

Two big wooden boards were arranged on the counter and the ingredients and supplies were positioned for easy access.


For the black bean and cheese tamales, each one begins with a big scoop of masa, which is smooshed out over the corn husk by hand.


The masa is not as sticky when it is cold from the fridge, but on the other hand it is much stiffer and harder to smoosh. Next comes a scoop of black beans.


Then a big dollop of grated jack cheese. Then the husk is used to close the masa over the filling, ideally overlapping the husks significantly to prevent leakage during cooking.


Strips of corn husk are used for ties. I used two styles of tying this time to differentiate between the hot pepper and black bean ones since the kids don't like the hot peppers.


This sequence is shown from left to right below.


The hot pepper tamales progress similarly, but instead of black beans, a hot pepper is used for filling instead. The progression is shown below.


Violet and Millie actually were quite helpful in assembling the tamales!

Violet had the idea of drawing some faces on some of the corn husks with our washable non-toxic markers.


She made two of these, one name "Tom" the other named "Molly". Here is a song she wanted me to video and put on youtube.


Cooking
After assembling, we loaded the tamales into a pot set up as a steamer.


The tamales are steamed for 1 hour, then allowed to cool on the counter.


Don't let the steamer run dry like I did on the second load of tamales. There is plenty of melted fat and cheese down in the steamer water by that point and it can get pretty ugly if the water runs out.

Eating
Ah, delicious. The kids love to slather on sour cream.


Becky and I ate a few with freshly made guacamole. I've eaten many a tamale with creme fraiche, which we often have in the fridge.

Storage
These things freeze extremely well. I pack them 9 or 10 to a big ziplock and stack up the bags in layers in the freezer. To reheat, just put straight from the freezer into a steamer for around 20 minutes or until heated well all the way through. Its already been cooked, so this is just to condition it for serving.

We got 70+ tamales from this batch, about 2/3 of which are shown below. We put them through as three steamer loads, two on Sunday, one on Monday night.


It is inevitable that you will have leftovers of something since all the ingredients won't run out simultaneously. So we are still working through a big tub of black beans by eating them in tacos.